
If you’ve been following along with the Coco Kelley seasonal floral how-to’s, you’ve likely observed that we’ve tried to give you a whole gamut of options for learning how to create your own floral masterpieces. Spanning Spring, Summer, Fall and Winter, modern, earthy, old-world and classic vessels, and assembly options to boot, your floral arranging wheelhouse should be filling up!
Today we’re focusing on a romantic floral tutorial that ushers in spring with its subtle color, and there is one more method to go over as well: using floral foam.

For the floral selection, we’ve focused on soft spring blooms like ranunculus, hellebore, garden roses and poppies.
For the floral foam, my favorite brand is Oasis (I like most of the options for foam they offer; here I’m using ‘maxlife’.) A few benefits of using foam is that you can insert/place a stem with near guarantee that it won’t move on you. Also, it caters to stem insertion of many angles and you can therefore get much more of that cascading-over-the-rim effect.

Start by using a kitchen knife to cut your Oasis to the size of your vessel, allowing for an inch or two above the vase rim. Next, fill your sink or a large tub with water and about a teaspoon of flower food. Throw your oasis into the water mixture and let it naturally absorb until fully submerged. Now you’re ready to put it into your vase. Once this is done, secure with a strand of floral tape.

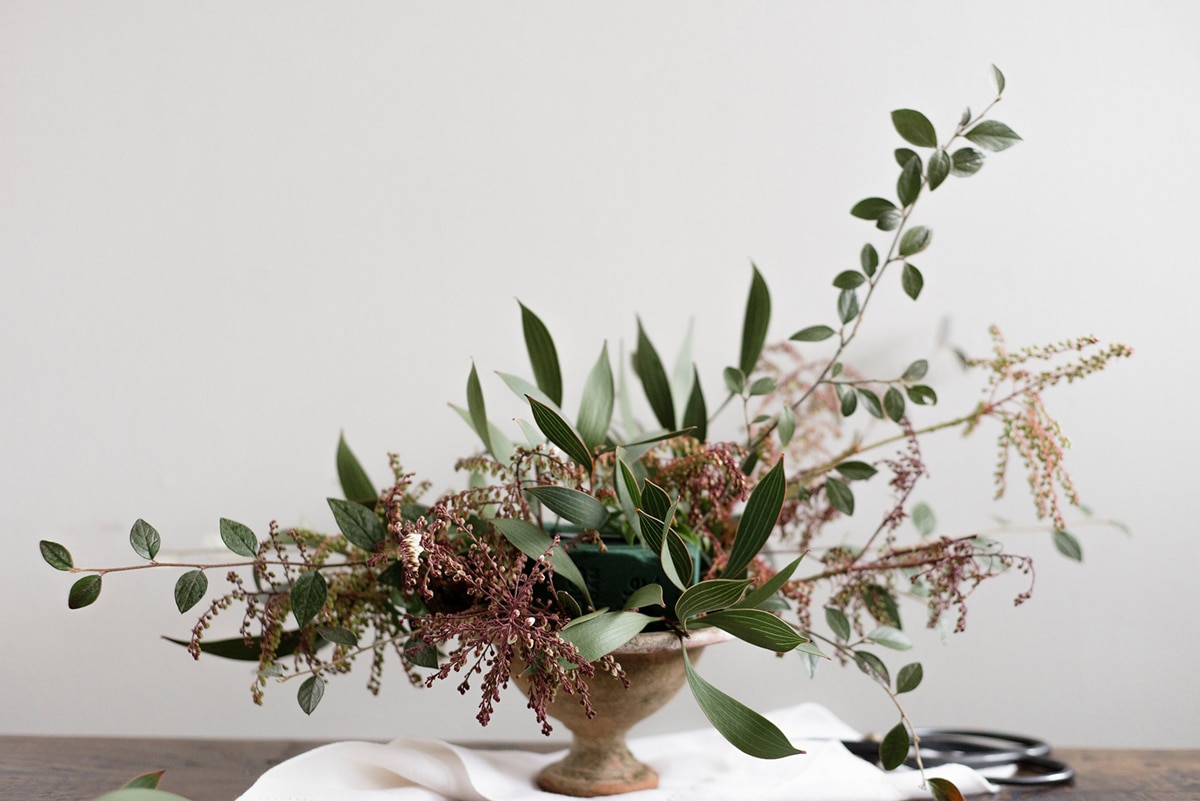
Next we begin our arrangement much like we’ve done in previous posts, adding the majority of our ‘greenery’ to create the overall shape. Pieris, although not technically green, is what I used as filler. In keeping with my preference for asymmetry, I’m going to use a few longer branches to pull the eye up and away.

Using branches that I foraged for (LOVE those gold/browns and muted greens) I’ll continue to mimic the shapes I made with the Pieris, remembering to build up, down and in-between


Now it’s time to fill in with floral! Since I’m using the Oasis, I can put this Hellebore stem in at an upturned angle so that the little flower will hang over the side of the vase rim, kind of feeling like it’s floating in the air. Allow your eye to seek out these spots that feel right for each type of flower.

I’m going to continue adding in my flowers, following those lengthy visual lines I made with those branches, remembering to keep some stems short (to cover any remaining foam) and some stems long. Group a few blooms of each type of flower together for an intentional feel.

While it may feel like you’re creating a piece of art, the good news is that you can rearrange as you go! Nothing is permanent here.
With only one garden rose available, I’m going to pick a prime spot for it! I want him in the front, so I’m going to remove the two roses I had previously placed, and insert them in a similar area, but on the opposite side.


Last but not least, here comes some blackberry to add a little more texture and visual interest. I’m doing a few short stems near the center, and then a few longer stems to drape outwards.


You’ve probably noticed that our floral how-to color palates are moving into a more unified, cohesive direction. For this arrangement, that Pieris base we built told our full color story; mauve, brown, burgundy, golds, and pinch of green. If you’re struggling with arrangements feeling elevated or intentional, take a look at where and how many pops of color you’ve got. In this one, I only have a few moments of that yellow and coral to truly make a meaningful PUNCH!


Have you used our tutorials to create your own centerpieces yet? If you do, let us know by tagging with our hashtag: #ckstyleaccordingly!