
If ever there was a year to embrace your inner creative, and make easy home updates that don’t cost you much in effort, but can help pass the time, 2020 is it. I’ve loved seeing so many home projects come out of my fellow creatives, but this one happened to be a favorite. This summer, Andrea Whalen of Virginia Kraft transformed her builder-grade fireplace tiles with some fresh and fun pattern (what else do you expect from a textile designer!?). I asked her if we could feature a little tutorial based on the instagram story she shared, and she kindly obliged!
But first, I wanted to know where she got inspired not only for the idea but also the pattern! I love getting a peek into people’s creative process, so I asked Andrea to share a little with us about her and this design!
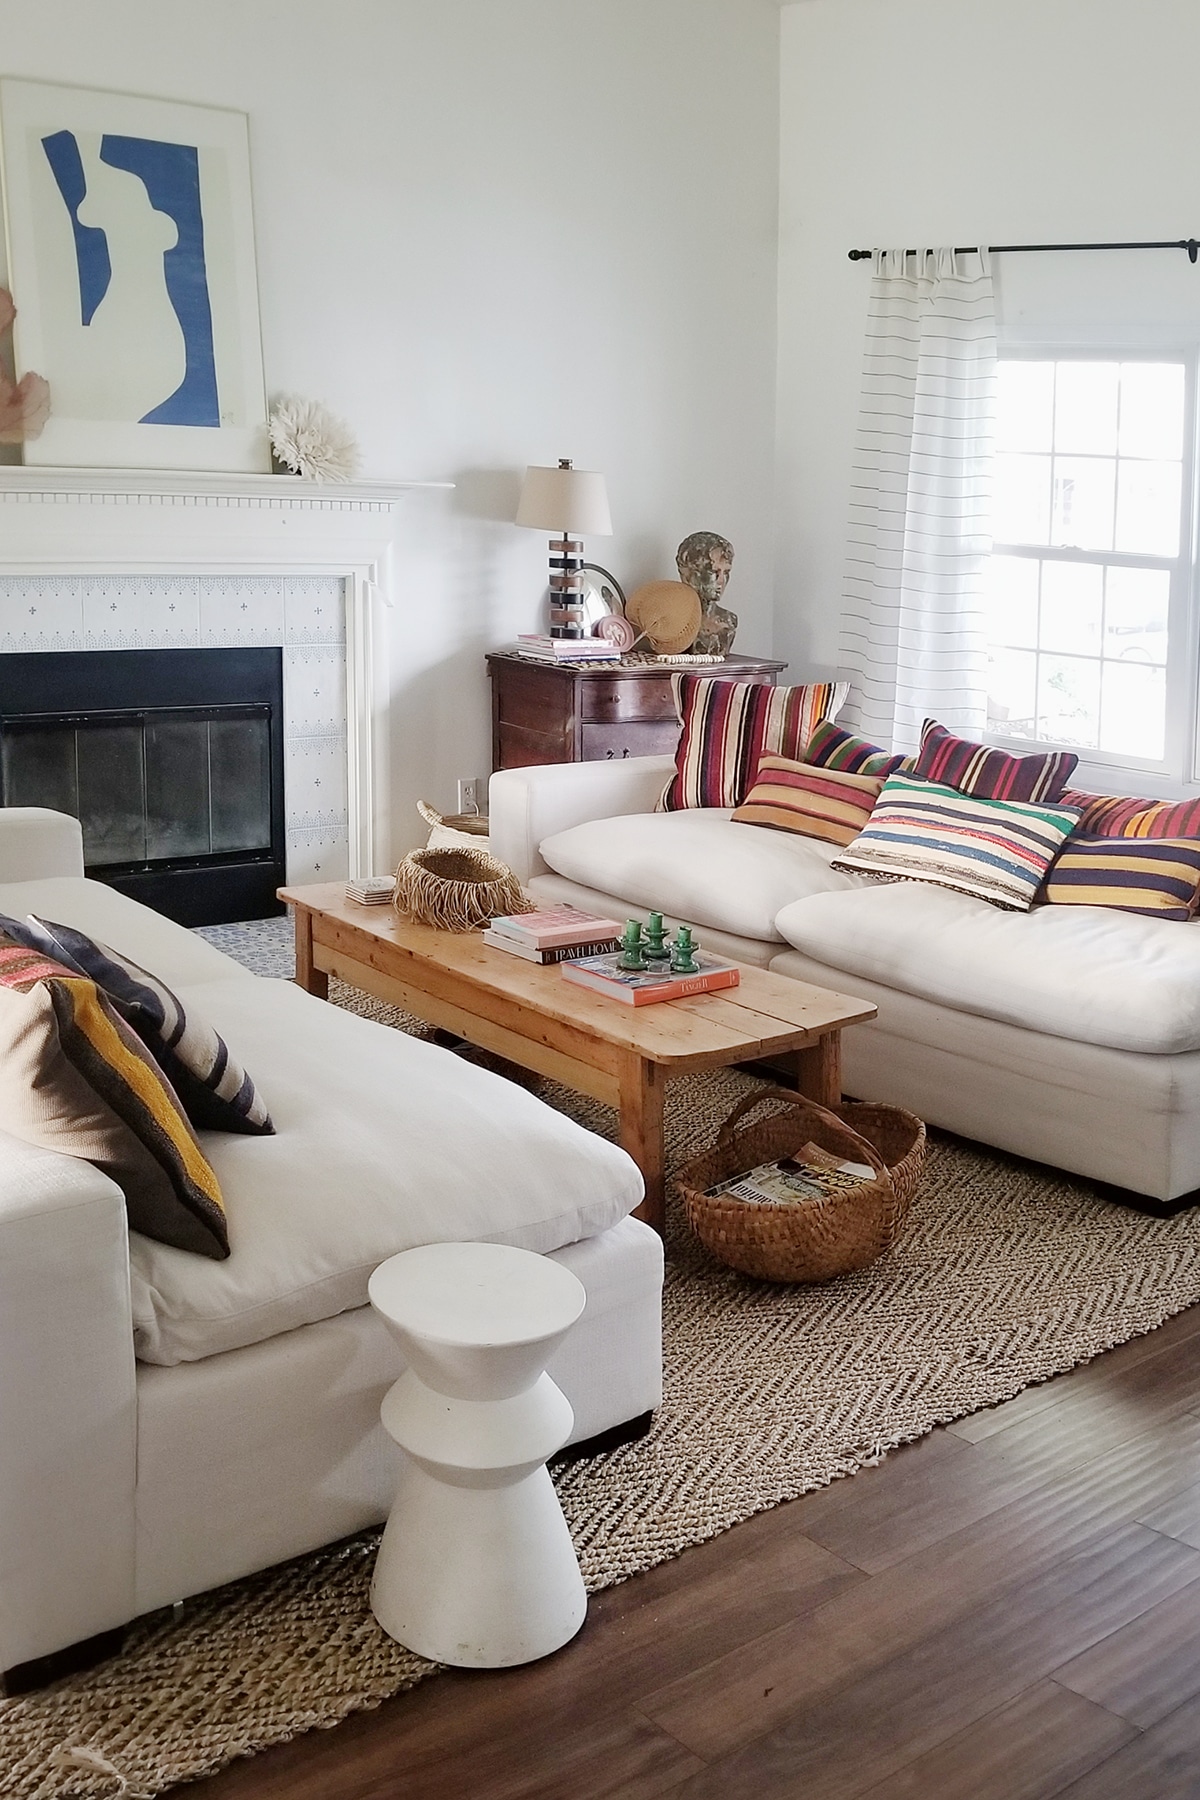
My inspiration came from wanting to feel transported to another place and El Fenn hotel and riad in Morocco is very high on my list of must-sees. The choice of pillows, candleholders, and tiles were all inspired by Moroccan aesthetics even though the tile motifs themselves were not – they were just made from the stamps I already had on hand which I carved previously for other projects.
I started in textile design after reading a blog post about a fabric designer in 2005. Something about it immediately clicked and I began filling notebooks with sketches and ideas. I began Virginia Kraft in 2013 by hand blocking the fabric in my basement studio. That quickly became overwhelming so I started having it printed elsewhere. In naming the business I knew I wanted it to be about something bigger than fabric, something with intention and the purpose of creating memories in a home. My favorite memories are of my maternal grandmother, Virginia Kraft, who passed in 2003, and so I could think of no better way to keep her spirit alive than to help others build new memories in their own spaces in her name. Our daughter is also named after her.
Here’s a peek at the finished product, but there are quite a few steps to get there, so let’s get started.
First, here’s a list of the tools and materials that Andrea used:
Tools & Materials:
- Foam stipple
- Foam roller
- White chalk paint
- Lightweight spackle
- Spackle knife
- Sanding blocks, fine grit
- Printing block material for stamp
- Linocutter for stamp
- Paint for pattern making (can be any type of paint)
- Clear matte poly sealer (ask for recommendations based on your tile!)
- Paintbrush
- Cloth rag
- Painter’s tape
Prep:
- Wipe down tiles with soapy water and a damp cloth, and dry. Tape off edges of the surround or hearth. Let the tiles dry completely.
- Apply 2-3 coats of chalk paint (if you have darker tile you may want to prime first!). Allow to dry completely.
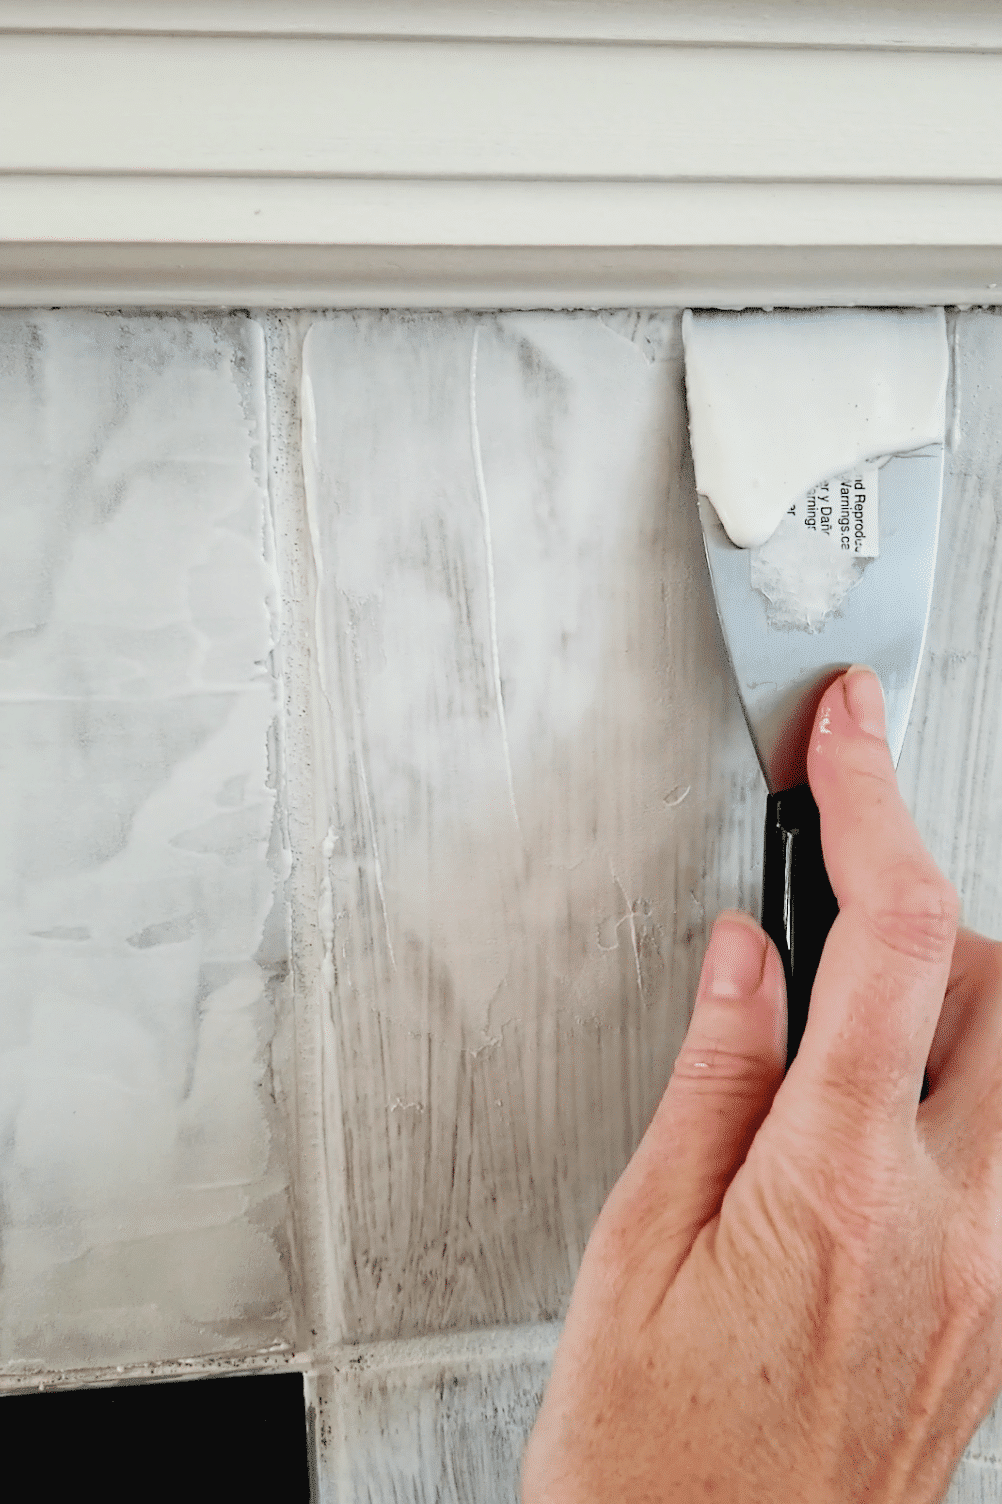
- To create a faux plaster look, you’ll mix the chalk paint with lightweight spackle in a 1:1 ratio. Apply the mixture with a spackle knife, allowing to dry between coats. Painting or plastering over the grout lines is optional and depends upon the desired look – in her fireplace, Andrea painted the grout, but left the plaster off of it.
- Once the surface is completely dry, lightly sand to create an even surface, and wipe off dust. Now you’re ready to block print!
There are many ways you can create your own stamps or patterns using everyday household items like an eraser or q-tip. For this project, Andrea created her own stamps with rubber and linocut tools from the art supply store. (Sidenote: I’m excited to try my hand at this because I’ve always been interested in block printing!!) She offered up these tips for her carving process:
Draw or trace onto the rubber with pencil (it can be erased if there’s a mistake), remembering that everything will print in reverse of what is drawn. Cut out the general shape first, leaving about a ¼” edge.
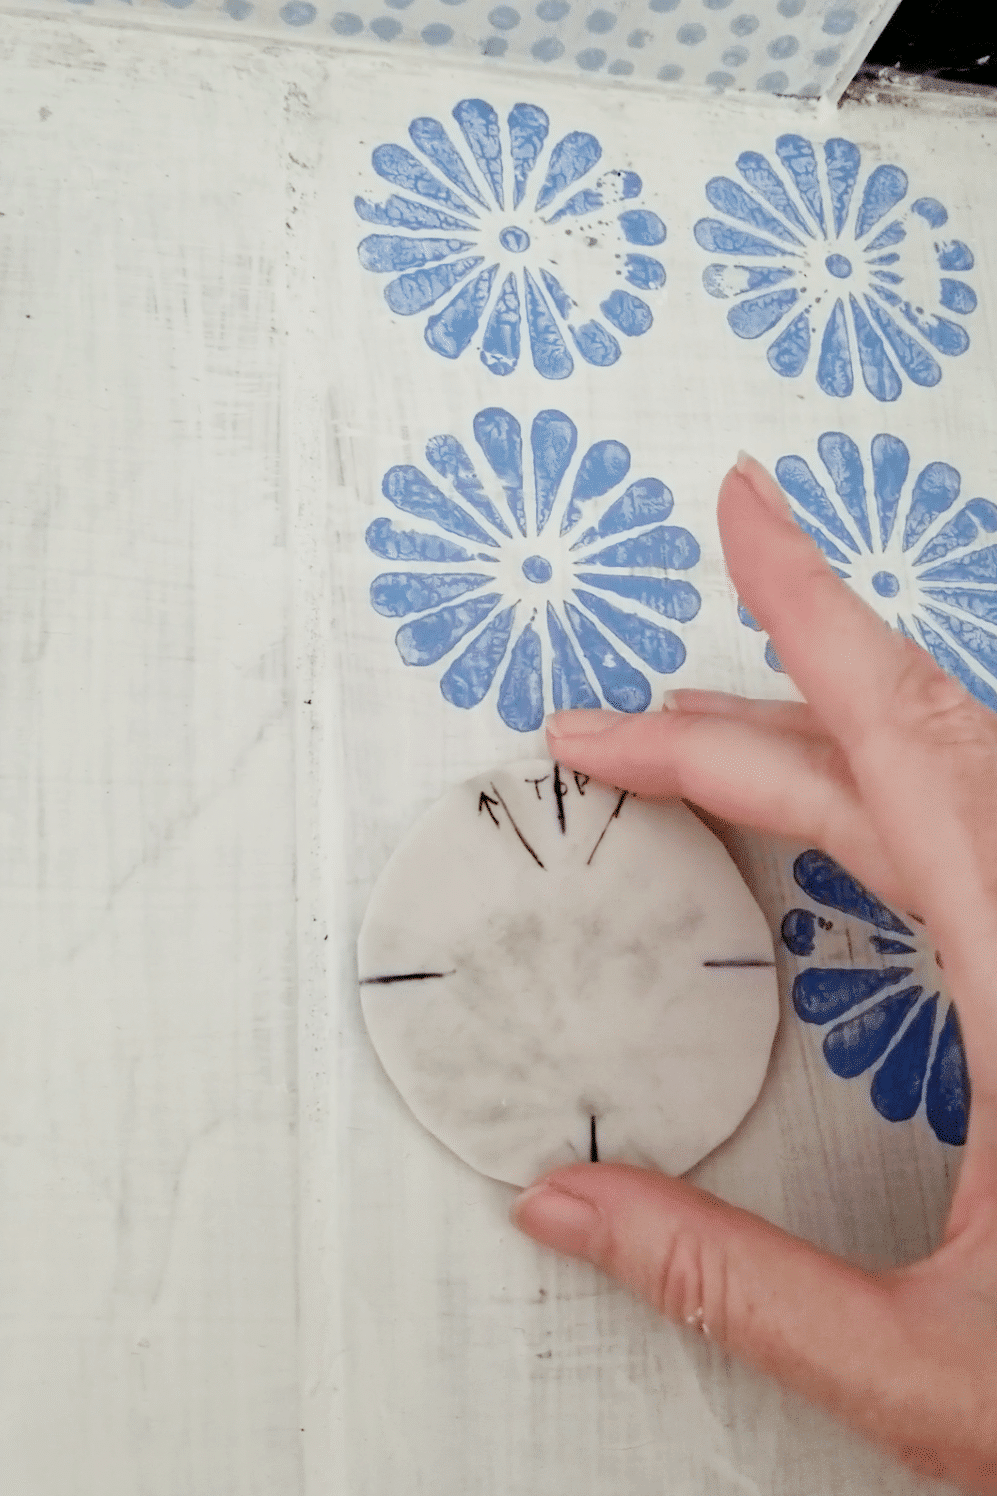
For my flower, I cut a circle around the whole thing about a 1/4″ outside the petals. This makes it easier to work with as it is carved. Start in the center and work outwards being very careful to not carve towards your fingers! That’s a mistake you only make once. I start with the smallest cutter and make a shallow outline around each shape, then use the larger but more shallow cutter to remove the bulk of the material. Remember that what is left is what will take the ink and show up as the image. I carve to a depth of about ⅛ ” but it can be less than that. Test the image to see if any unwanted ridges are left uncarved. There’s some good YouTube tutorials out there that show a more detailed process if you need more guidance!
Block Printing:
- Start by testing your stamp on paper first to get a feel for how hard you need to press down, and refine any cuts if you’ve made your own stamp! Practice on a piece of paper cut out to the same size as your tile to determine your ideal design. Your pattern will look more realistic if it repeats on the tile (leaving space for your grout!).
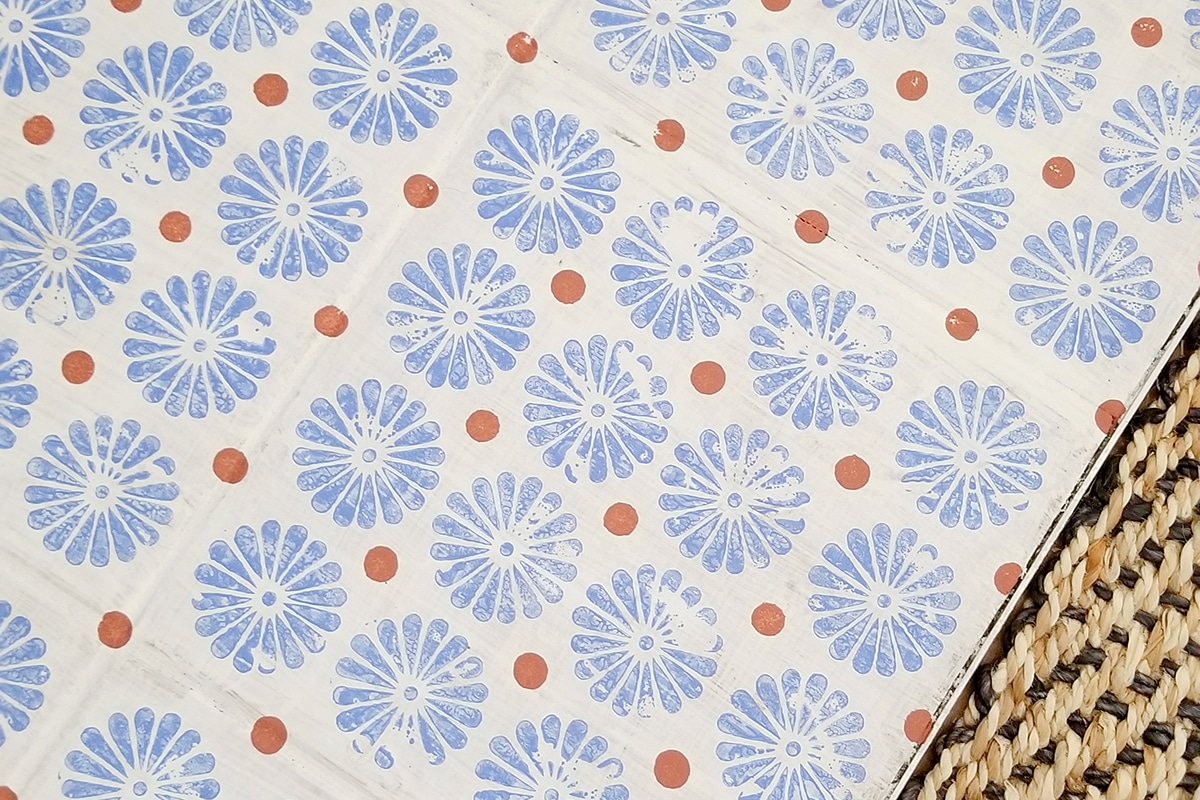
- Using the foam stipple or roller, apply your preference of colored paint to the stamp, then lightly press stamp onto tile. (Pro tip: Press each part of stamp thoroughly but gently.) Repeat until desired pattern is achieved.
- Once completely dry, roll or brush on clear matte sealer.
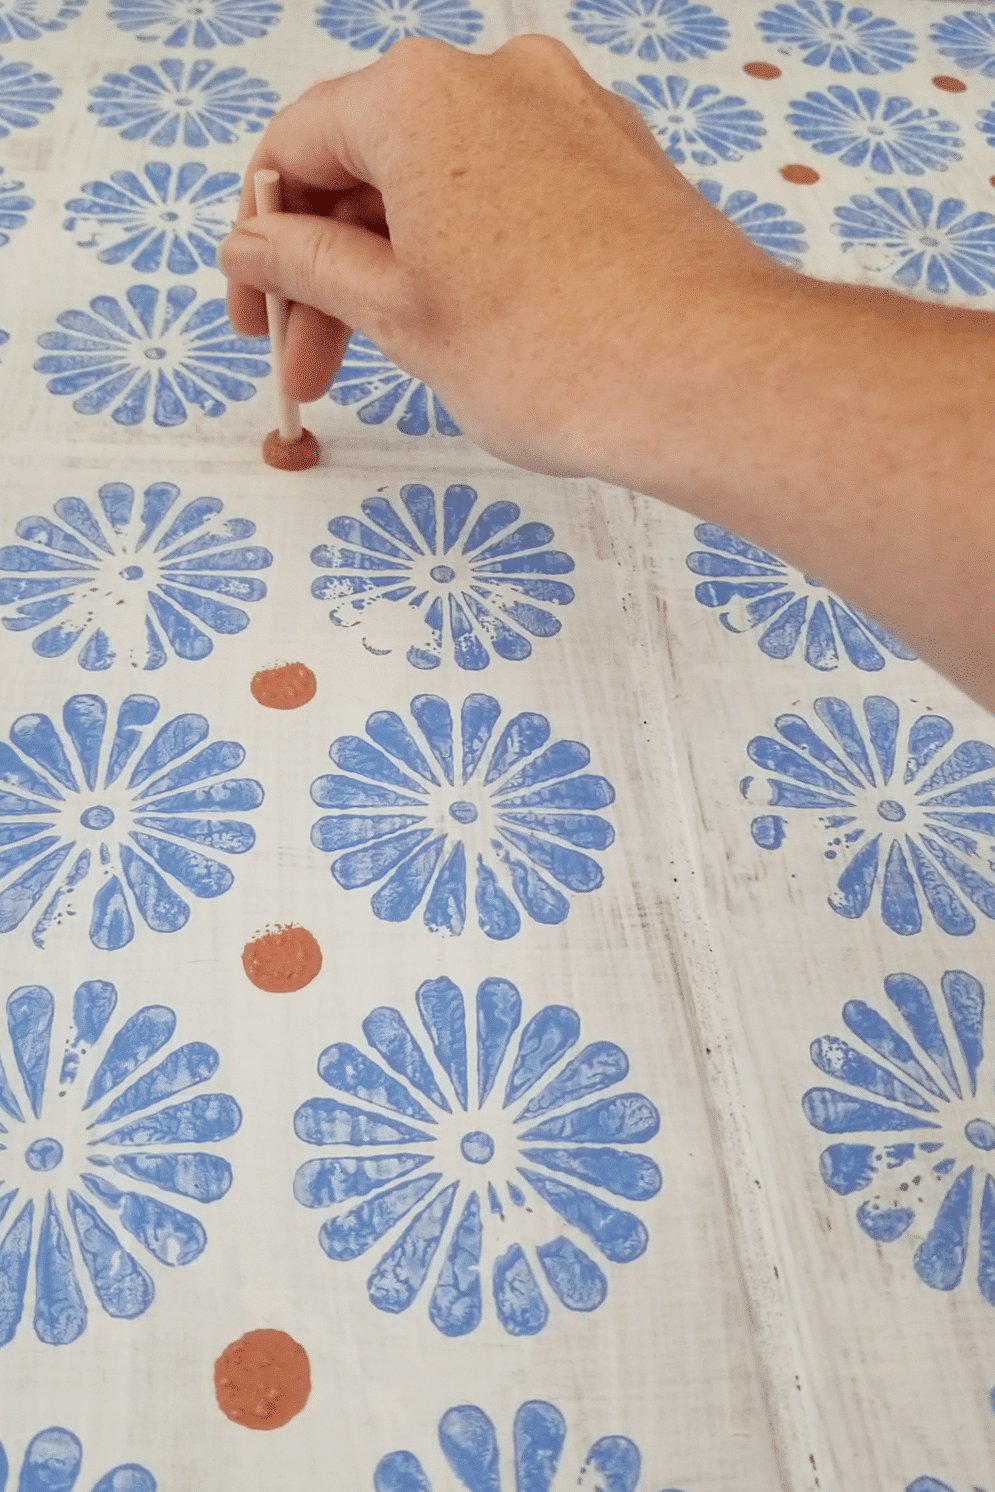
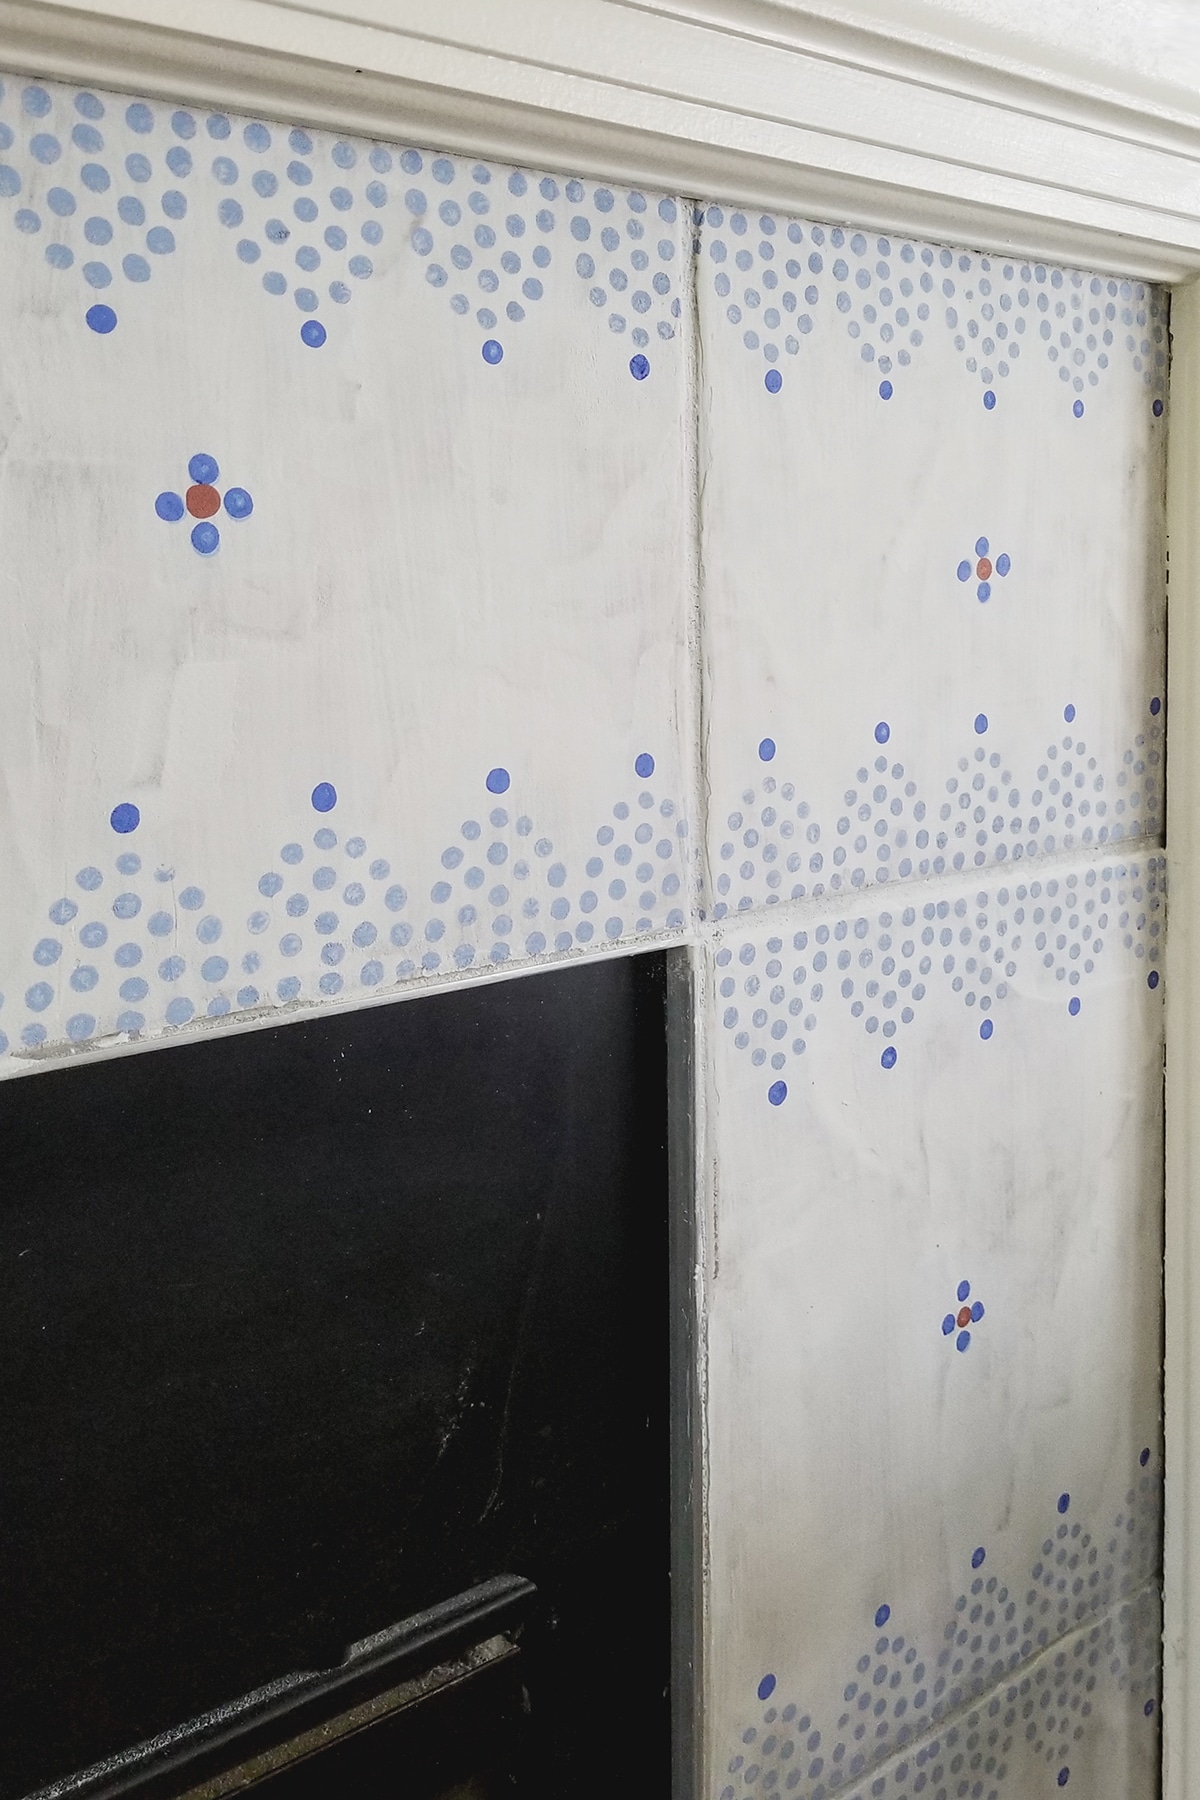
If carving a stamp isn’t your thing, use the stipple brushes to create your own pattern, like Andrea did here! The dots create their own shape when used all together. Lucky for us, she was kind enough to create a downloadable PDF with both her flower and dot designs on them for you to test out yourself! These can be scaled to whatever size best suits your tile.
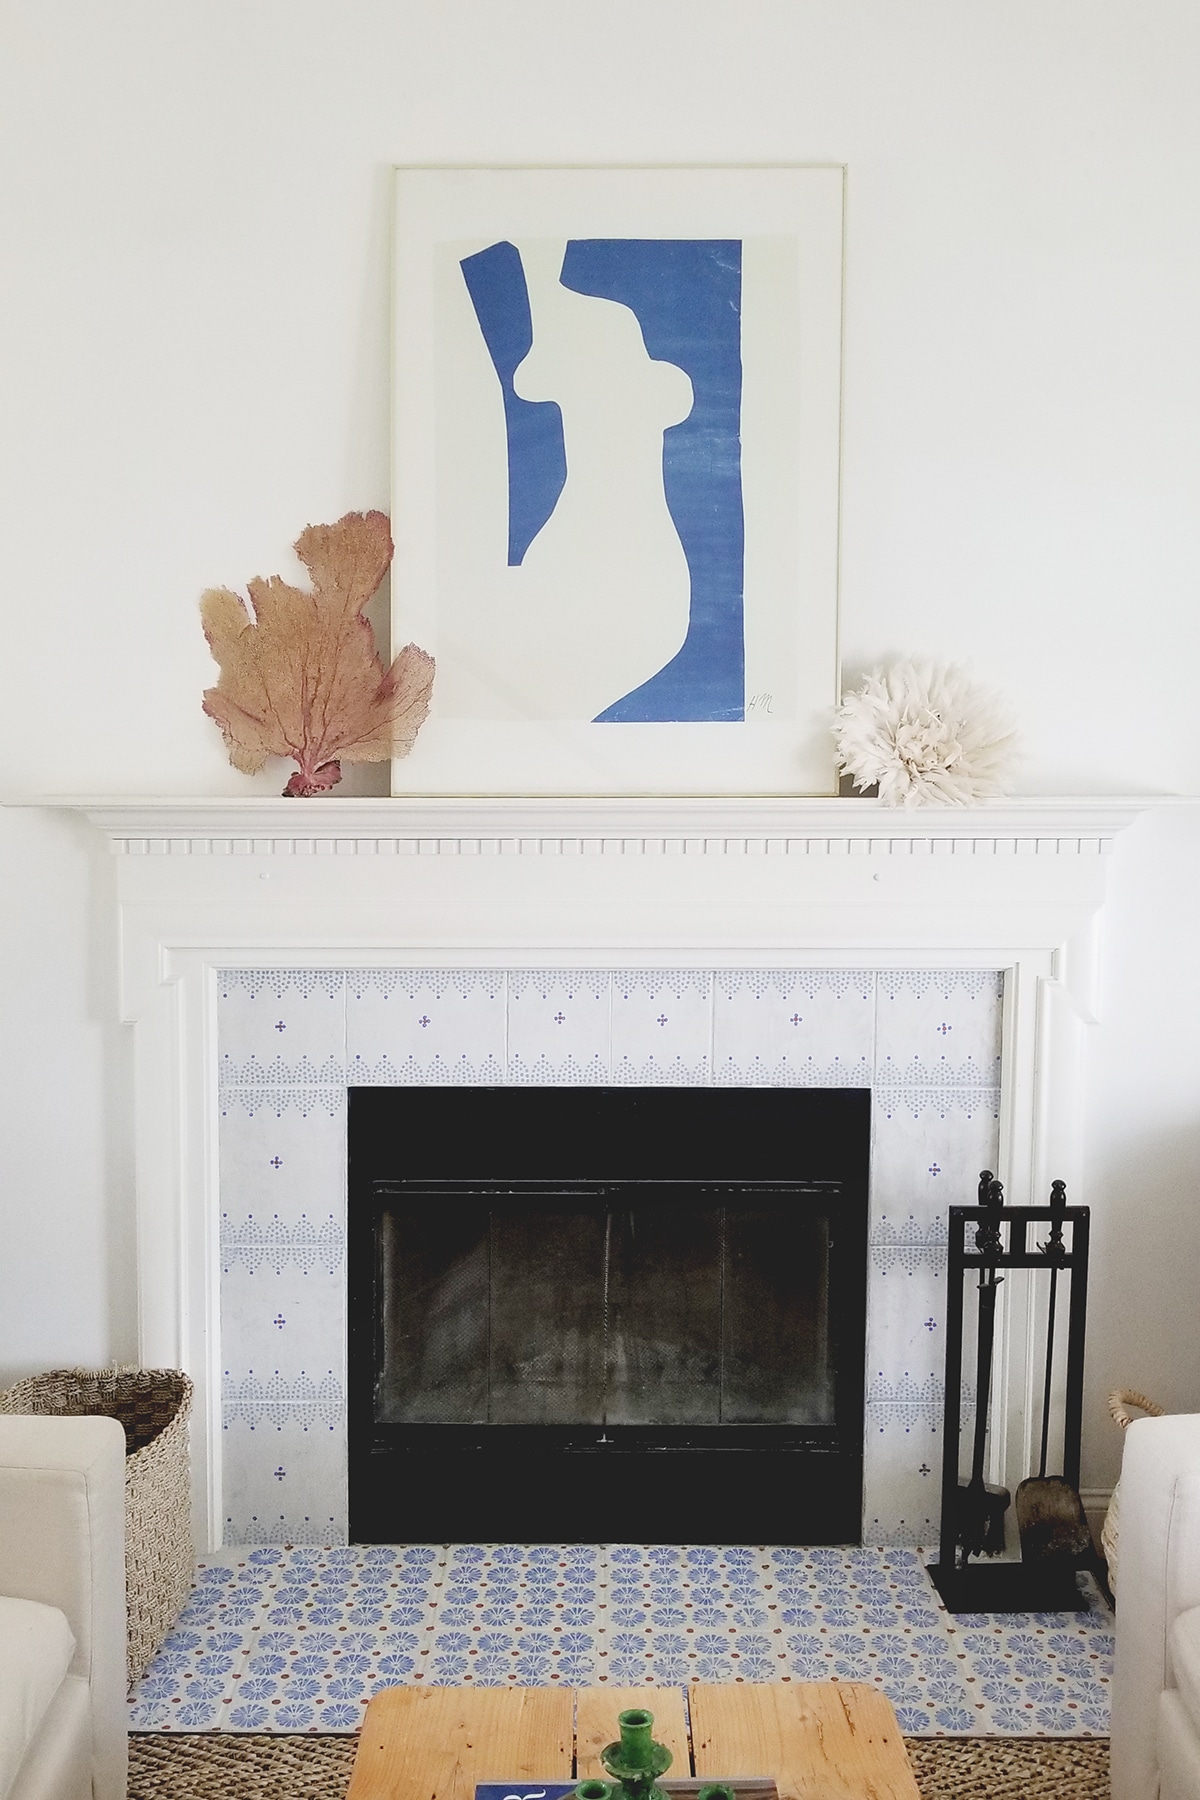
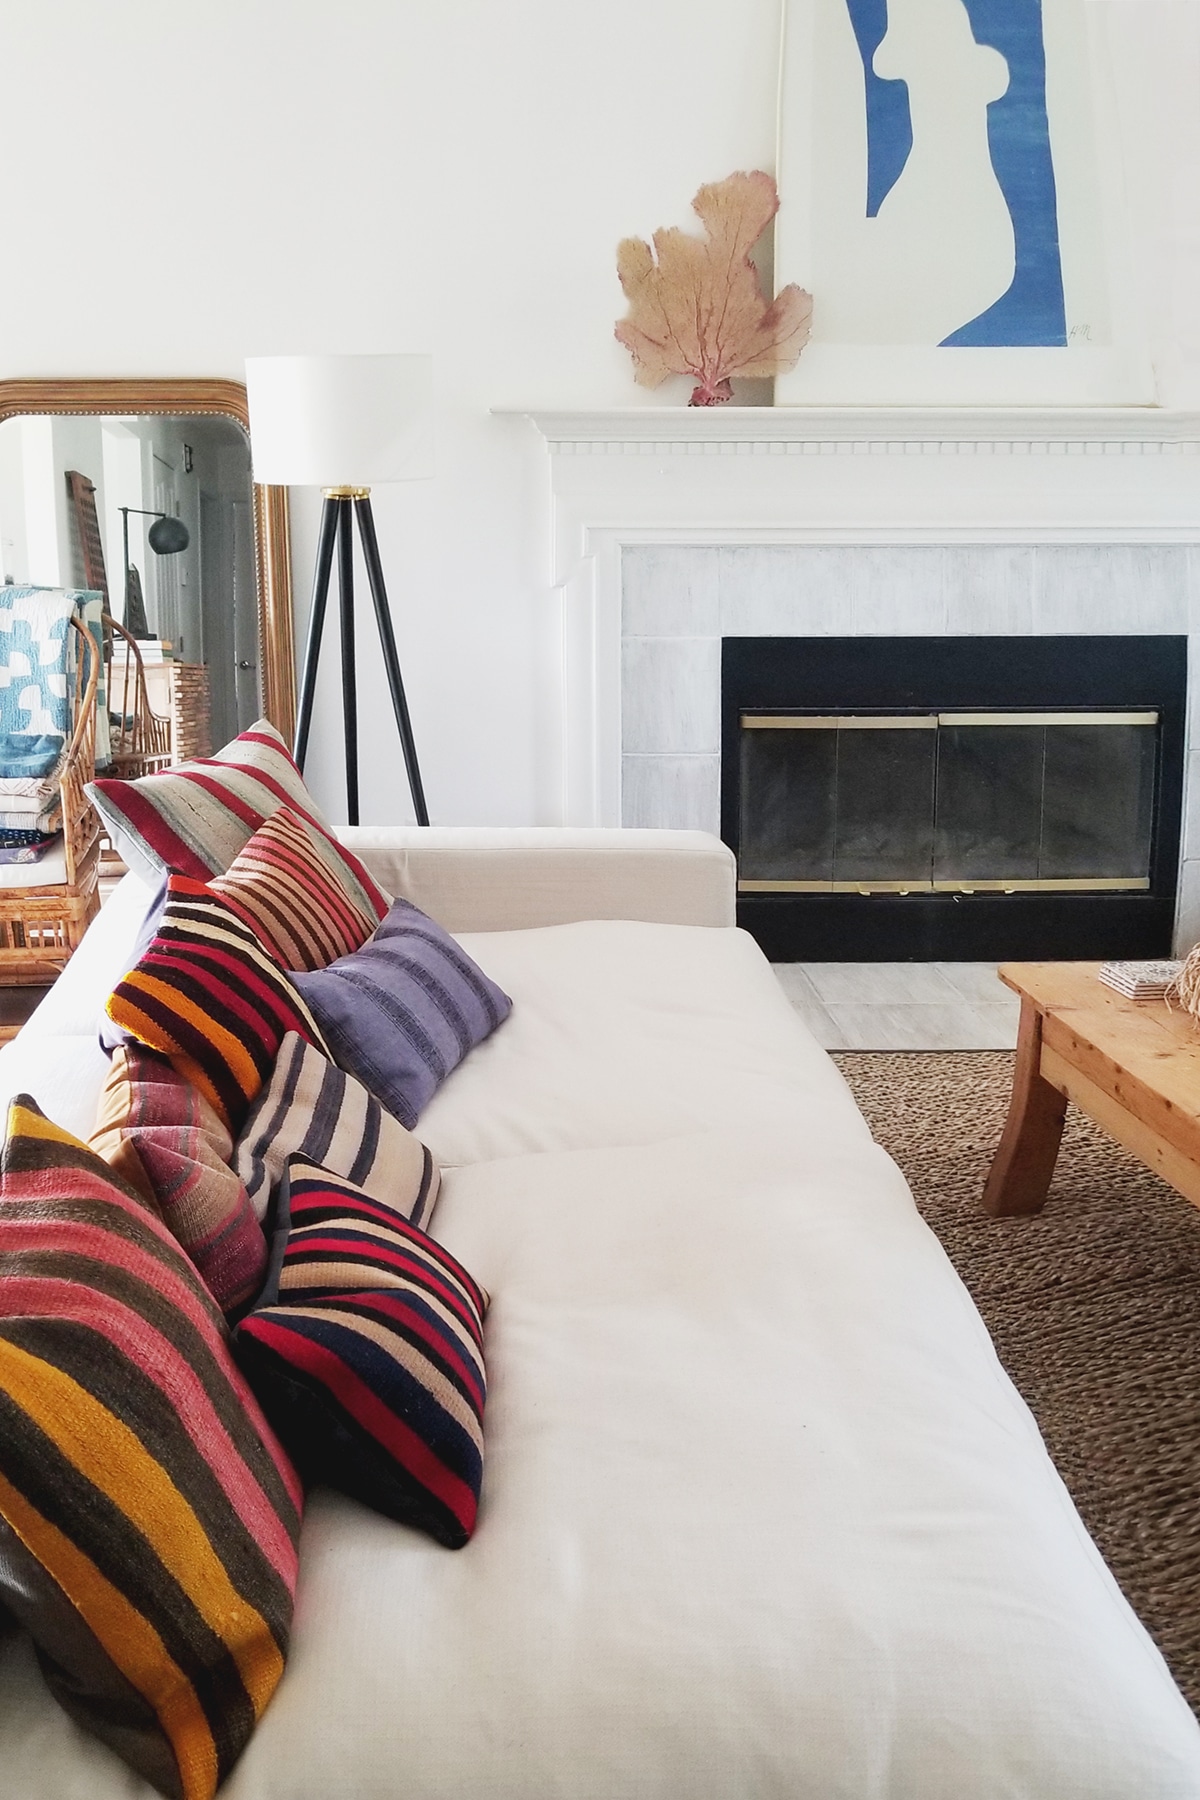
I absolutely love the effect the pattern has in her home!! It’s so well suited to her eclectic style, and I love how they mix with her kilim pillows. If you want to see more of her process, Andrea has some videos saved in her Instagram DIY highlight!! I found it helpful. If you’ve got questions, leave ’em in the comments and we’ll do our best to answer! And please tag if you try this out in your own home!! I wish I had a hearth to DIY, but sadly… no fireplace here.
Also, if you’re a textile lover or designer, please check out Andreas beautiful line of textiles at Virginia Kraft, or her new collection that just launched on Chairish!! I’m so obsessed! Might have to do an entire post on this line … it’s that good.