
It goes without saying that cabinets are the foundation of any kitchen remodel. They are the one thing you really don’t want to screw up, the item you are most likely to spend your time agonizing over, and definitely the place where diving into the details really matters. Also – measuring, measuring measuring. It can all be a bit overwhelming, but when they come together and get put into place? The reality of your new kitchen takes shape and it’s the BEST feeling.
After revealing the finished (!!!) remodel of our cellar kitchen yesterday over on Emily Henderson’s blog, I thought it would be fun – and helpful! – to get into more of the thought and design process behind our kitchen cabinets since that’s where most of the comments and questions landed! For me, designing cabinetry can be broken down into three big decisions: 1) Layout 2) Color & Style and 3) Functionality. So, I’m going to go through our process using those three main decision-drivers.
But first off, the most important piece of info: where we got our cabinets.
I worked with Masterbrand Cabinets when we remodeled our entire main floor kitchen with their Omega line a few years back. We had a wonderful experience, so I knew I wanted to work with them again. This time, however, we opted to go with their Diamond Cabinet line which is a bit less custom, and a bit more affordable. Even though our cabinets were sponsored, I wanted to keep things slightly more realistic as far as the type of cabinetry we would potentially choose to remodel a secondary kitchen. This cabinetry also had a shorter lead time, which was awesome.
LAYOUT
When we took an initial look at what this remodel would look like, my husband and I walked through the ways we would use this space to see if there was any big reason to change the current layout of the room. I’m sure many of you know by now that one of the biggest ways to save money on a remodel is keeping the currently layout, so you don’t have to move plumbing, electrical or gas lines around too much. But the fact was that we were going to have to gut the cabinets (they were in awful shape) and replace all the plumbing and electrical which gave us the perfect excuse to change things around! But we didn’t – and here’s why:
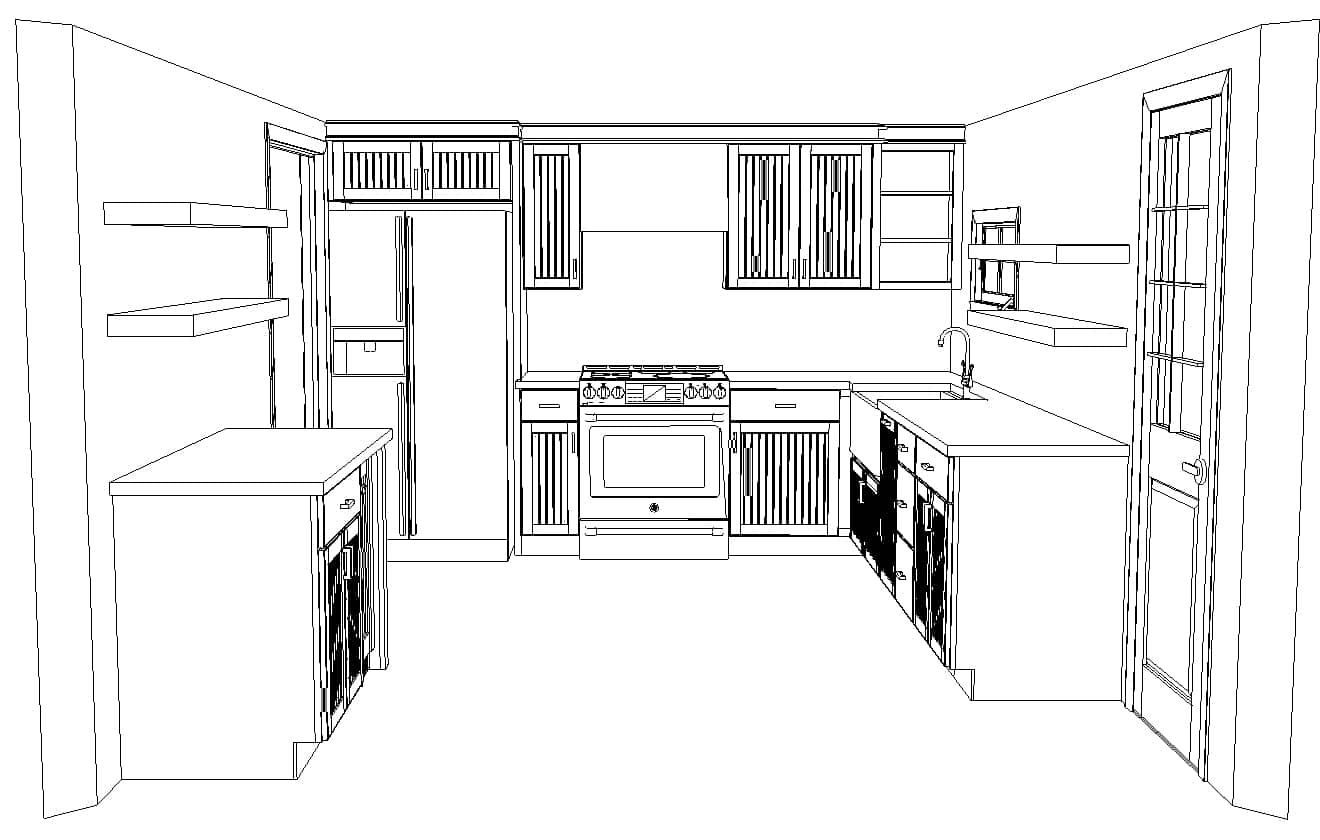
This was one of the first rounds of renderings we got from the designer we worked with at MasterBrand based on our preliminary rough measurements and layout requests. From here you can get a better perspective on the space. The door to the right exits to the back yard. If you were renting the apartment, you would come and go from here. Right now, this is the door we use to come and go from the garden. On the the left is an open entry to the living room. On the wall that we are looking out from are two doors: one on the far right that is the entry from the laundry room and stairwell, and one on the left that is a closet. As you can see… it’s a small space and a lot of doors to work around, making the layout options pretty restricted!
I played around a bit with the location of the refrigerator, but ultimately this was the best place for it to go. The only big change we had initially thought about was adding more cabinets to the left. We went back and forth on if they would be open shelves (as shown here), floor to ceiling cabinetry, etc, and ultimately landed on not doing them at all (I’ll get back to why in a bit!). Here’s more perspective, again from our initial rough renderings, with some of the smaller adjustments.
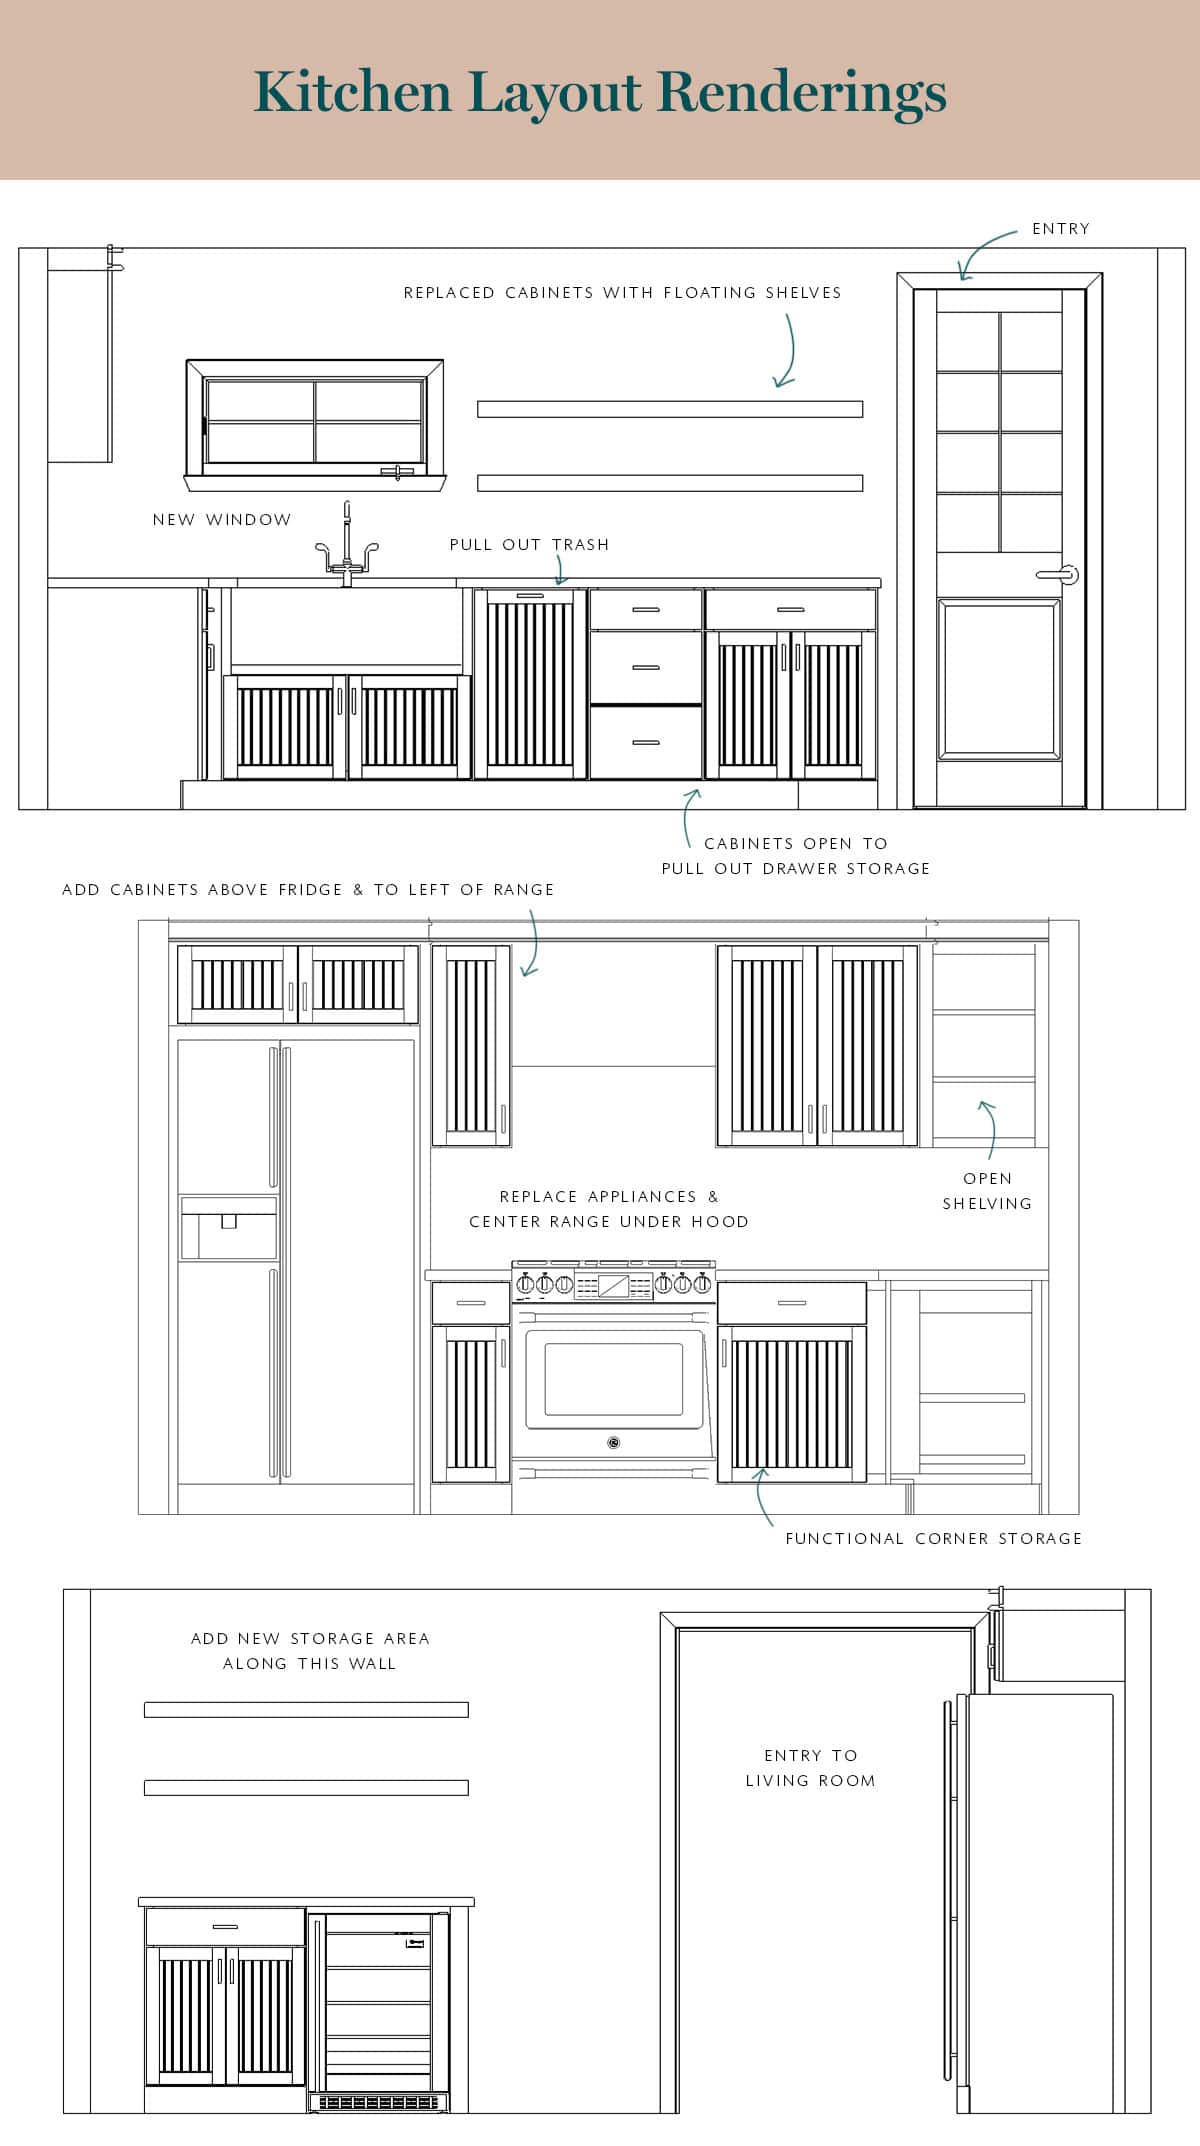
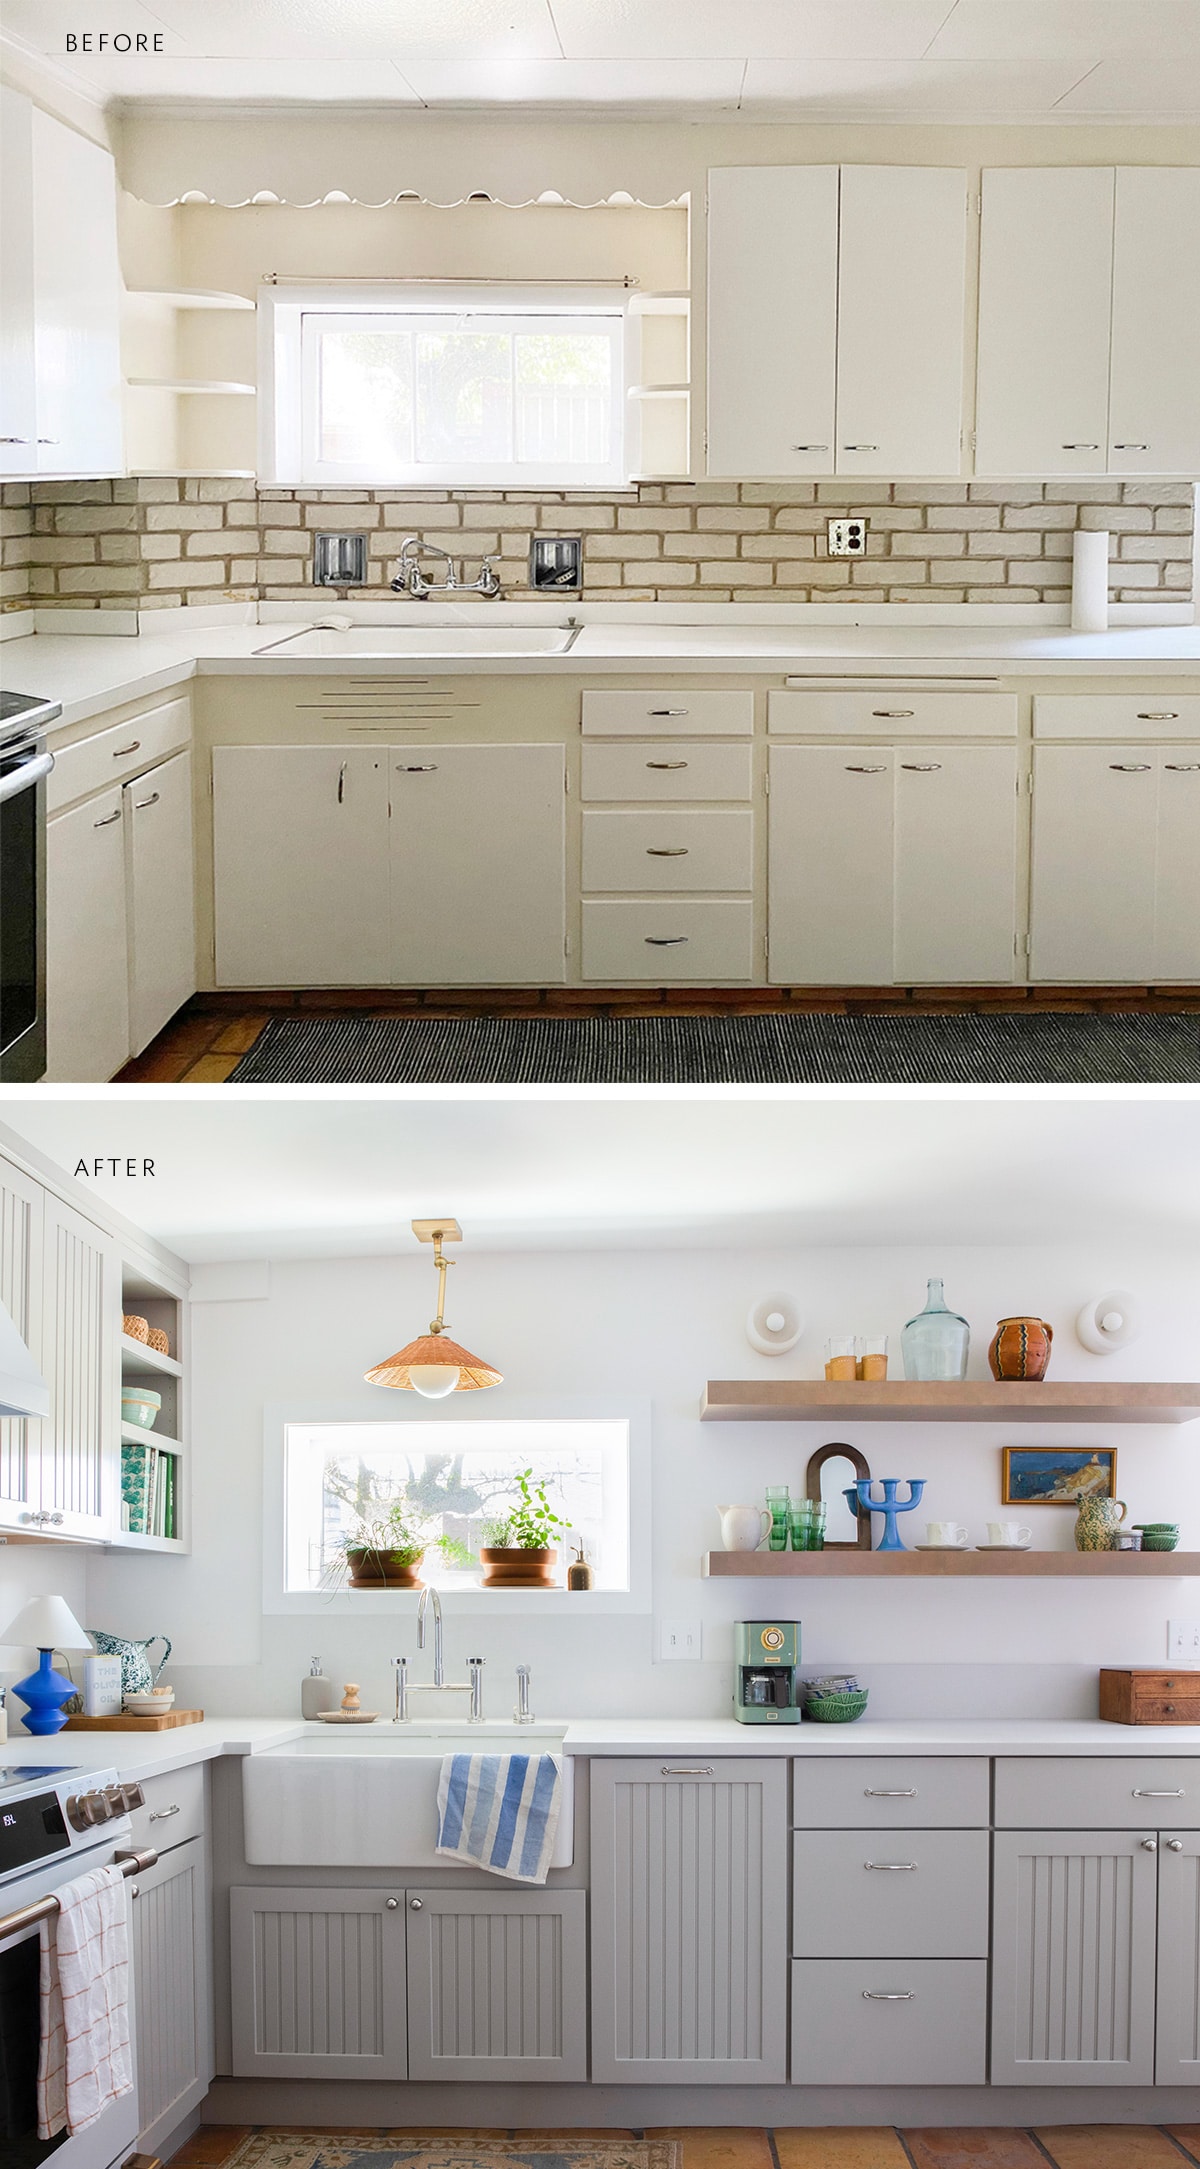
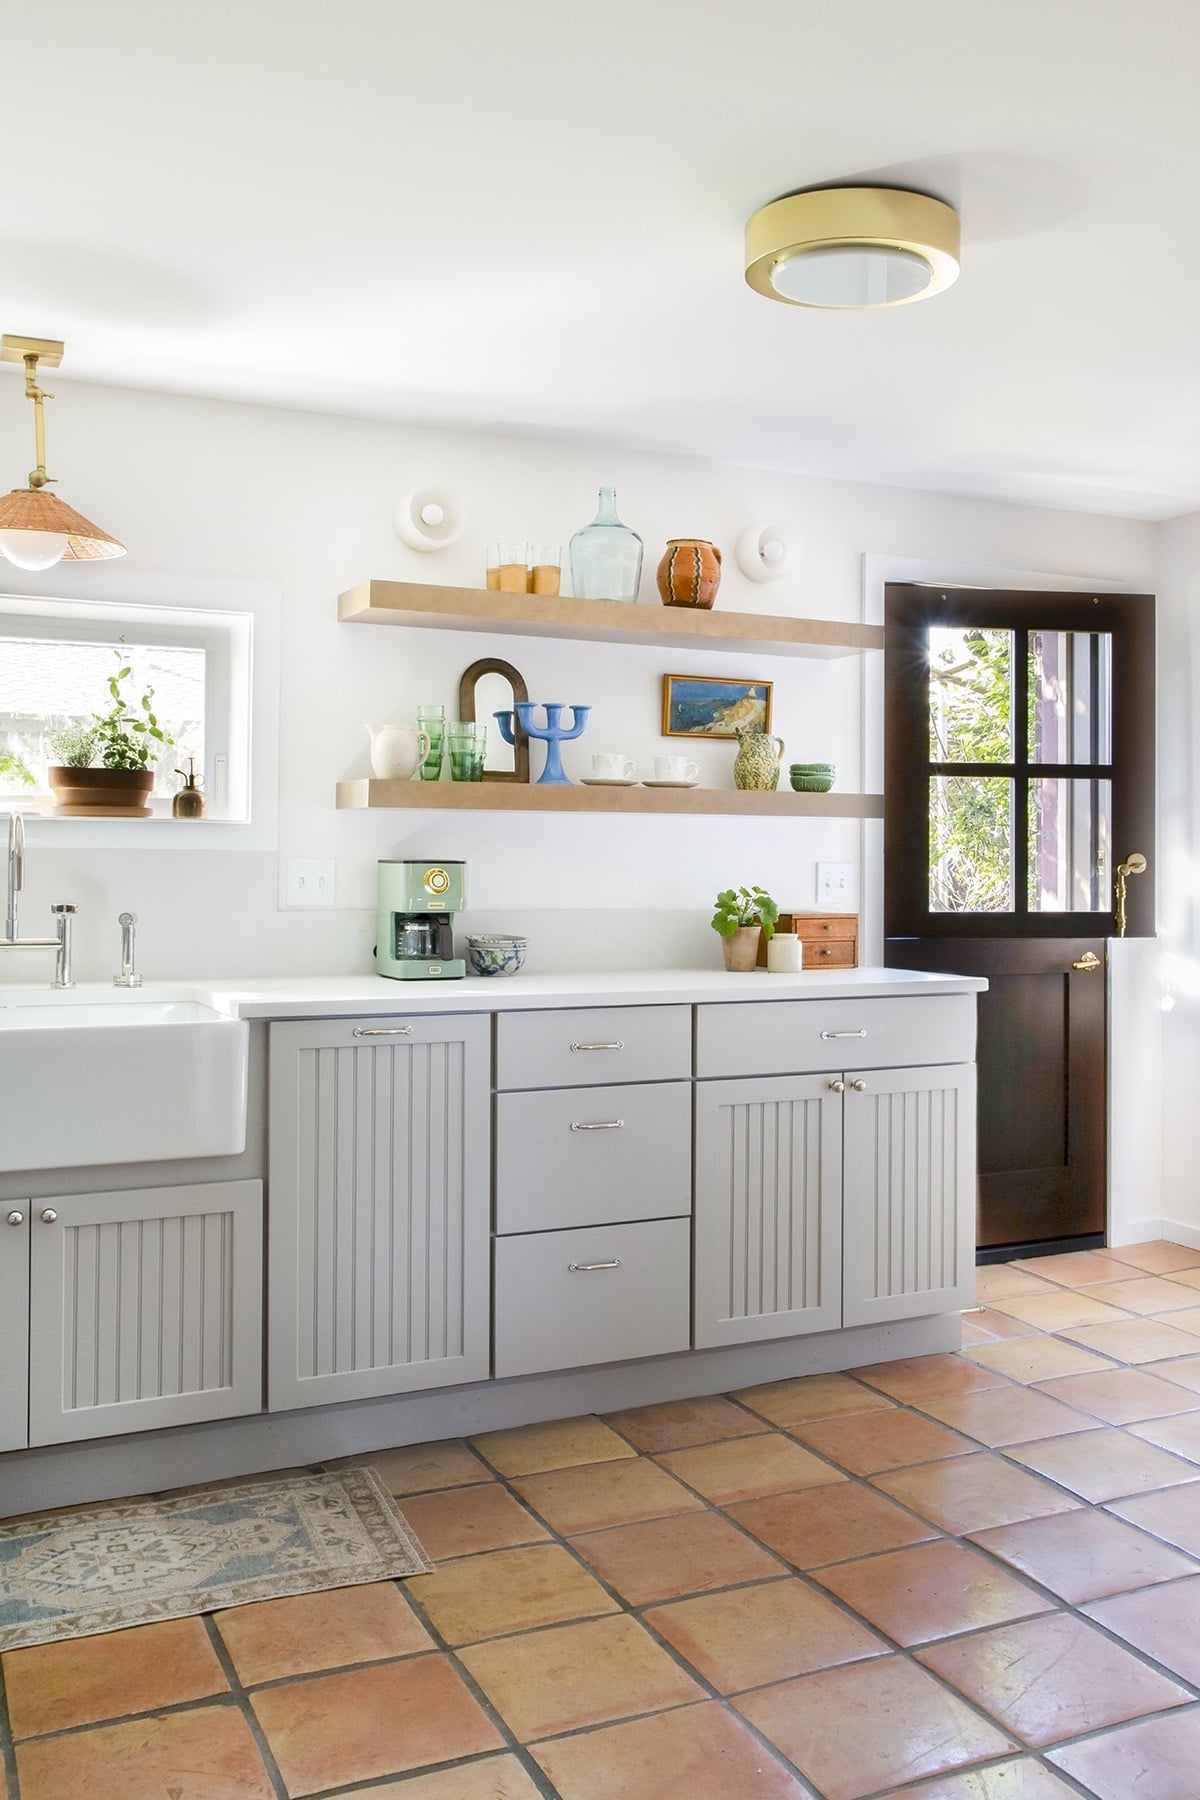
Most of the choices we made here are pretty basic. Replacing old cabinets with new always brings the option of more functional storage, and we took full advantage of that. The corner unit has pull out, layered storage. We added a combination garbage/recycle pull out to the right of the sink (gotta love hidden garbage vs having it sitting out!), the cabinet under the floating shelves has pull out drawer storage for pots and pans, and of course we’ve got some nice open shelving options too!
It seems like anytime I opt for floating shelves in a kitchen vs. cabinetry there’s a contingency of people who are really unhappy about it. It sort of cracks me up because – honestly – if it works for the home owner, who cares!! But let’s address the top concerns we always hear:
- Things get too dusty sitting out in the open. As far as I can tell, this very much depends on your home environment. For us specifically, this being a secondary kitchen, yes some things will eventually get dusty as they’re just sitting there, but we’re not really concerned about it. We’ll just wipe them down like we do with everything else in the kitchen. When we have guests, I re-set the shelves with more glassware and coffee mugs, and don’t have any problem with dust. That said, you could definitely flip them over if you’re worried about it. For what it’s worth, the items on our open shelves in our main kitchen seem to stay relatively dust-free, especially on the lower shelves. I give the upppers a good wipe down every month or two. Honestly… it’s not any more maintenance than anything else in the kitchen, so for us this simply isn’t an issue.
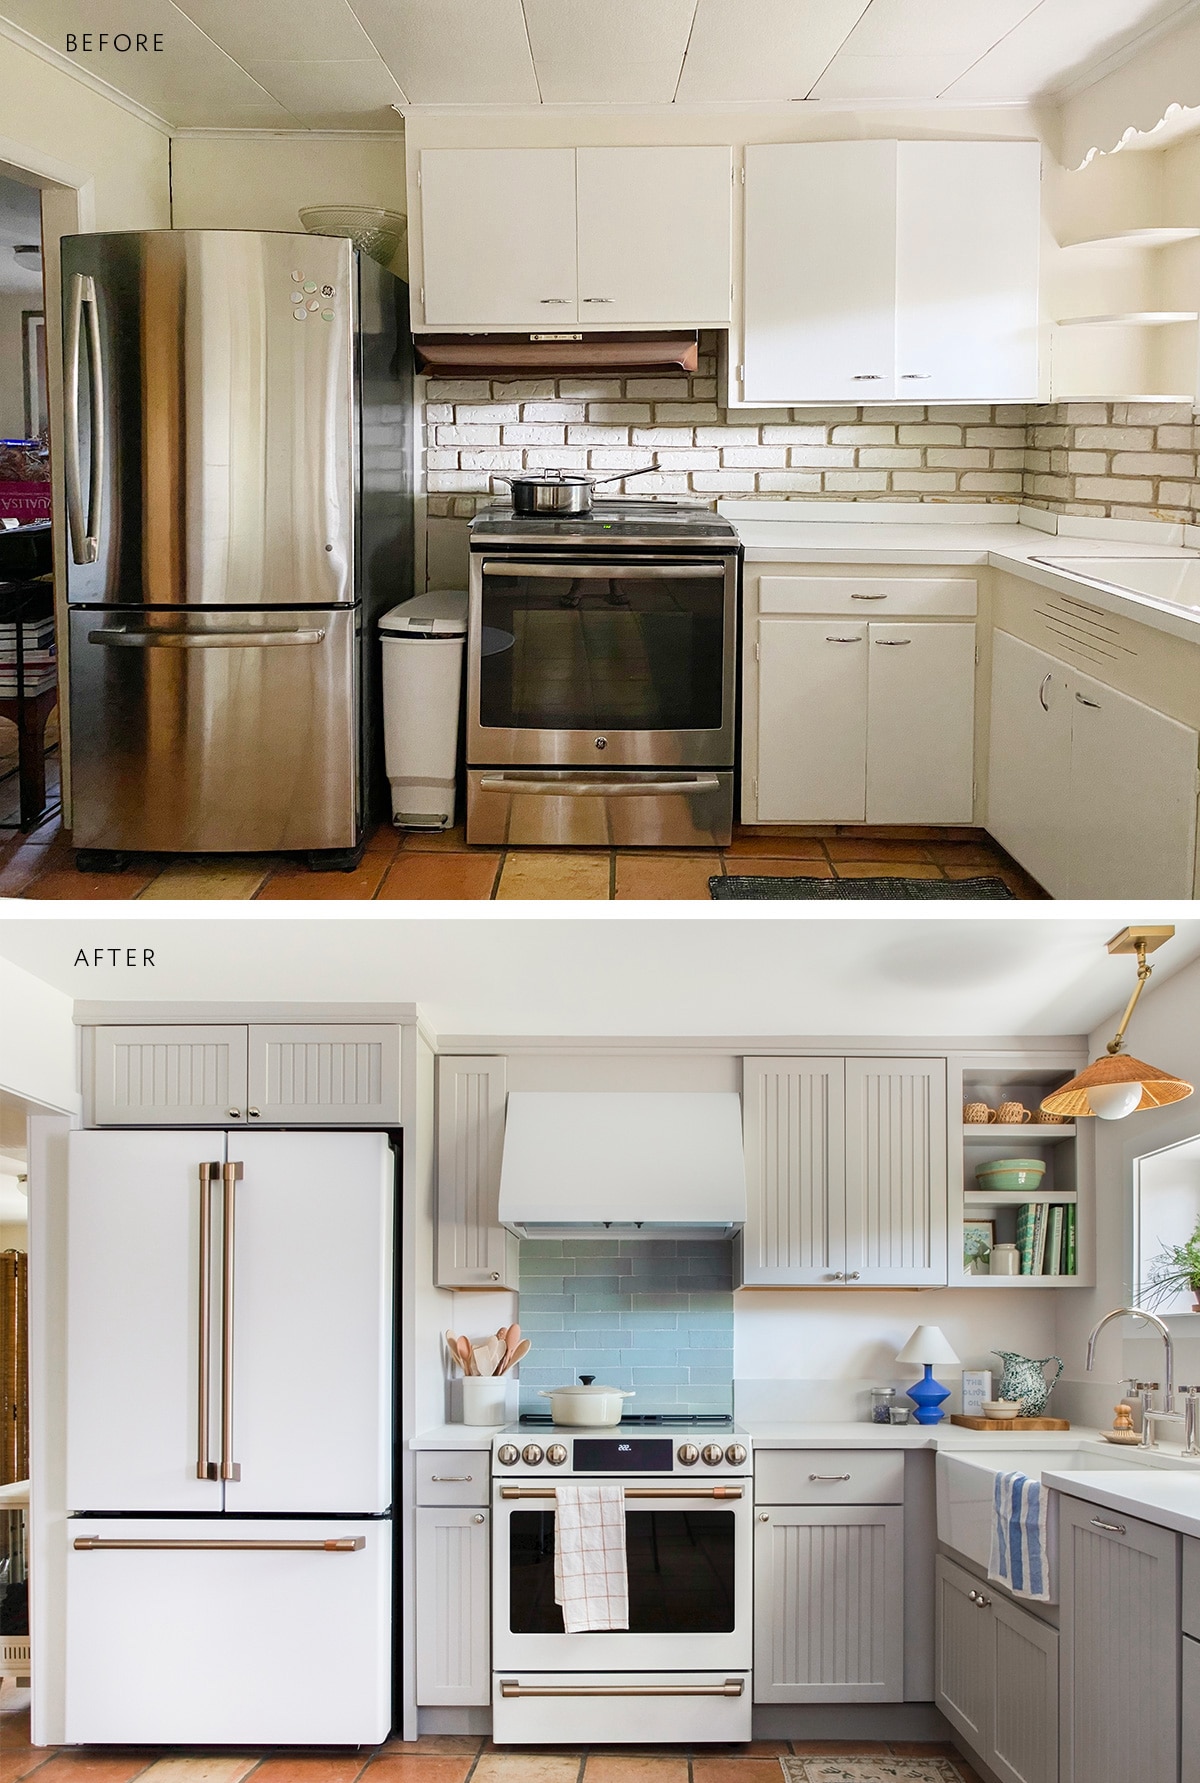
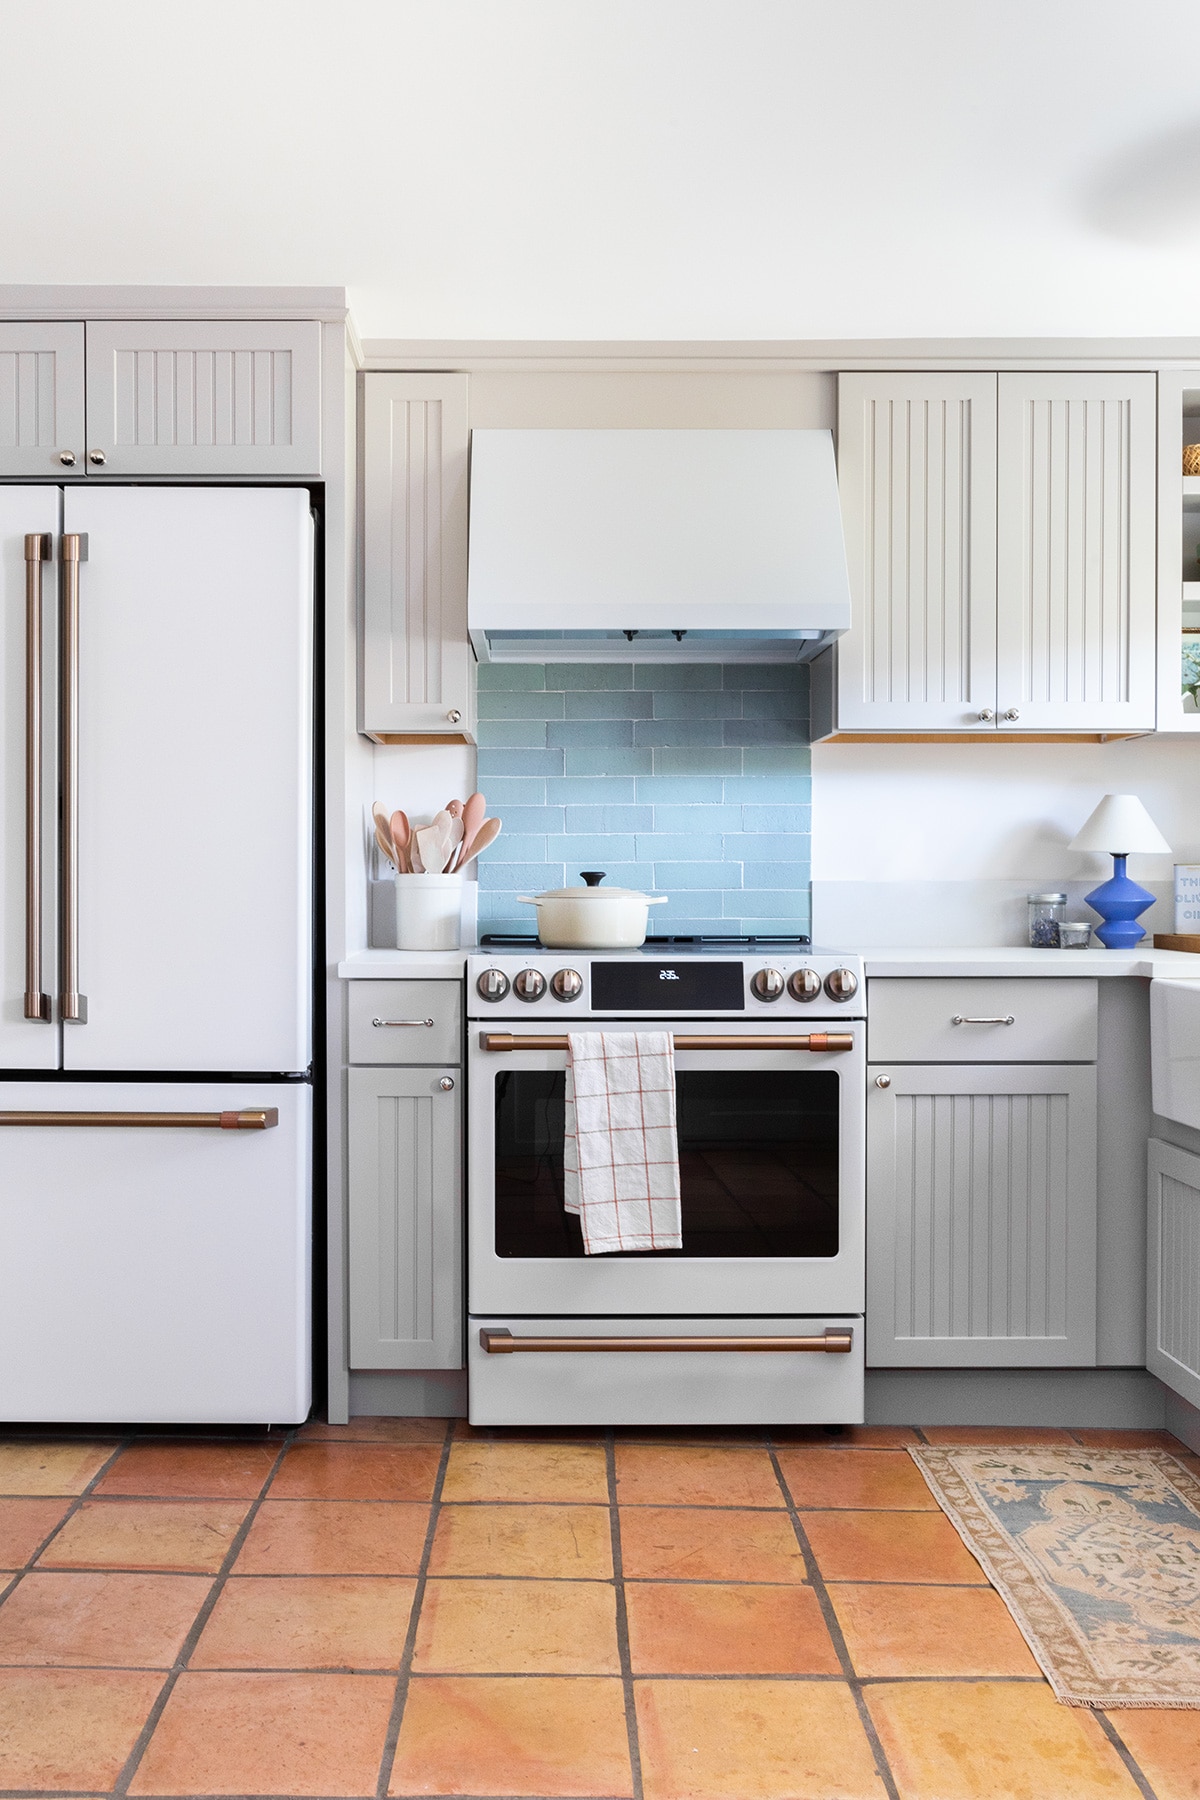
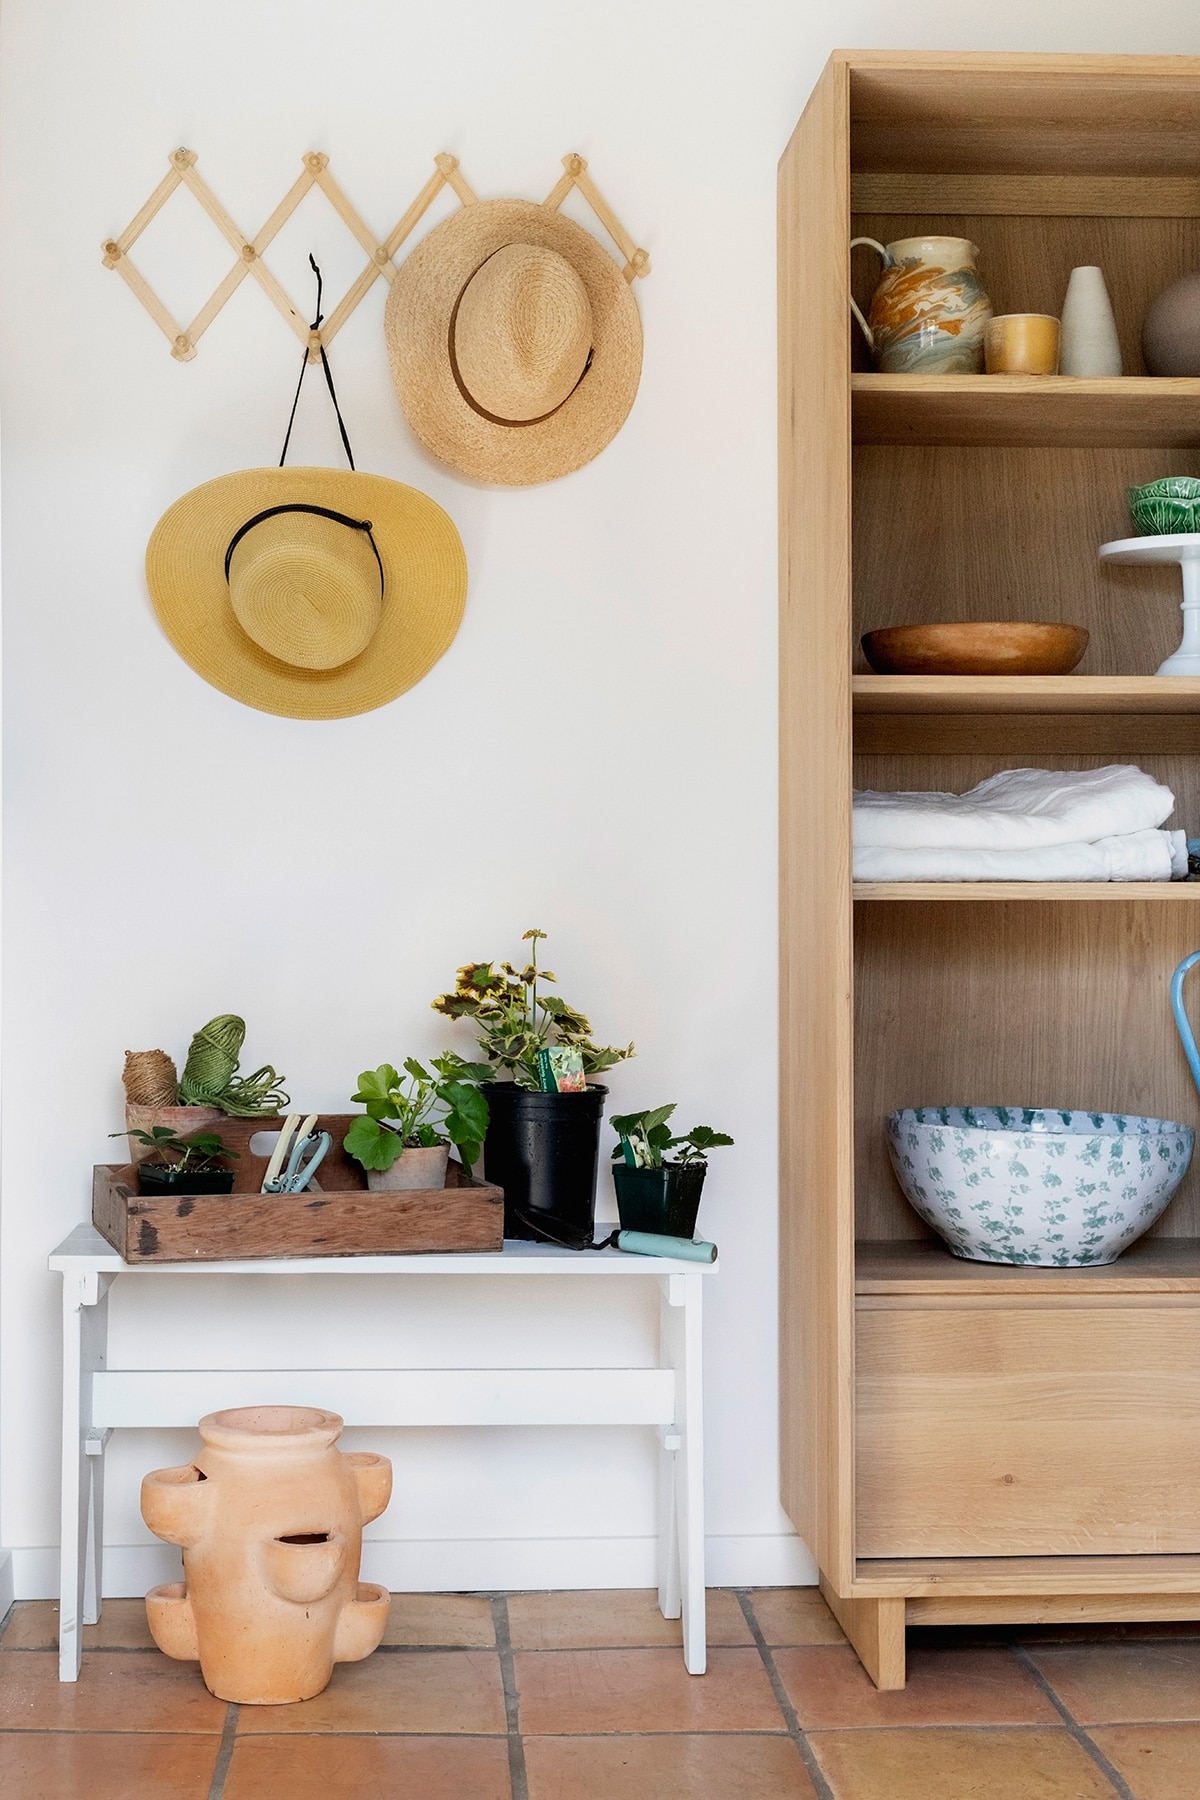
- You lose so much storage! Yep, you do. Unless you replace it elsewhere! Which we did. We added more storage to several places in the kitchen – above the refrigerator, to the left of the stove, and an entire furniture cabinet against the wall where we ended up not doing the additional cabinetry. So actually… we added MORE storage, and still got the benefit of beautiful open shelves to style.
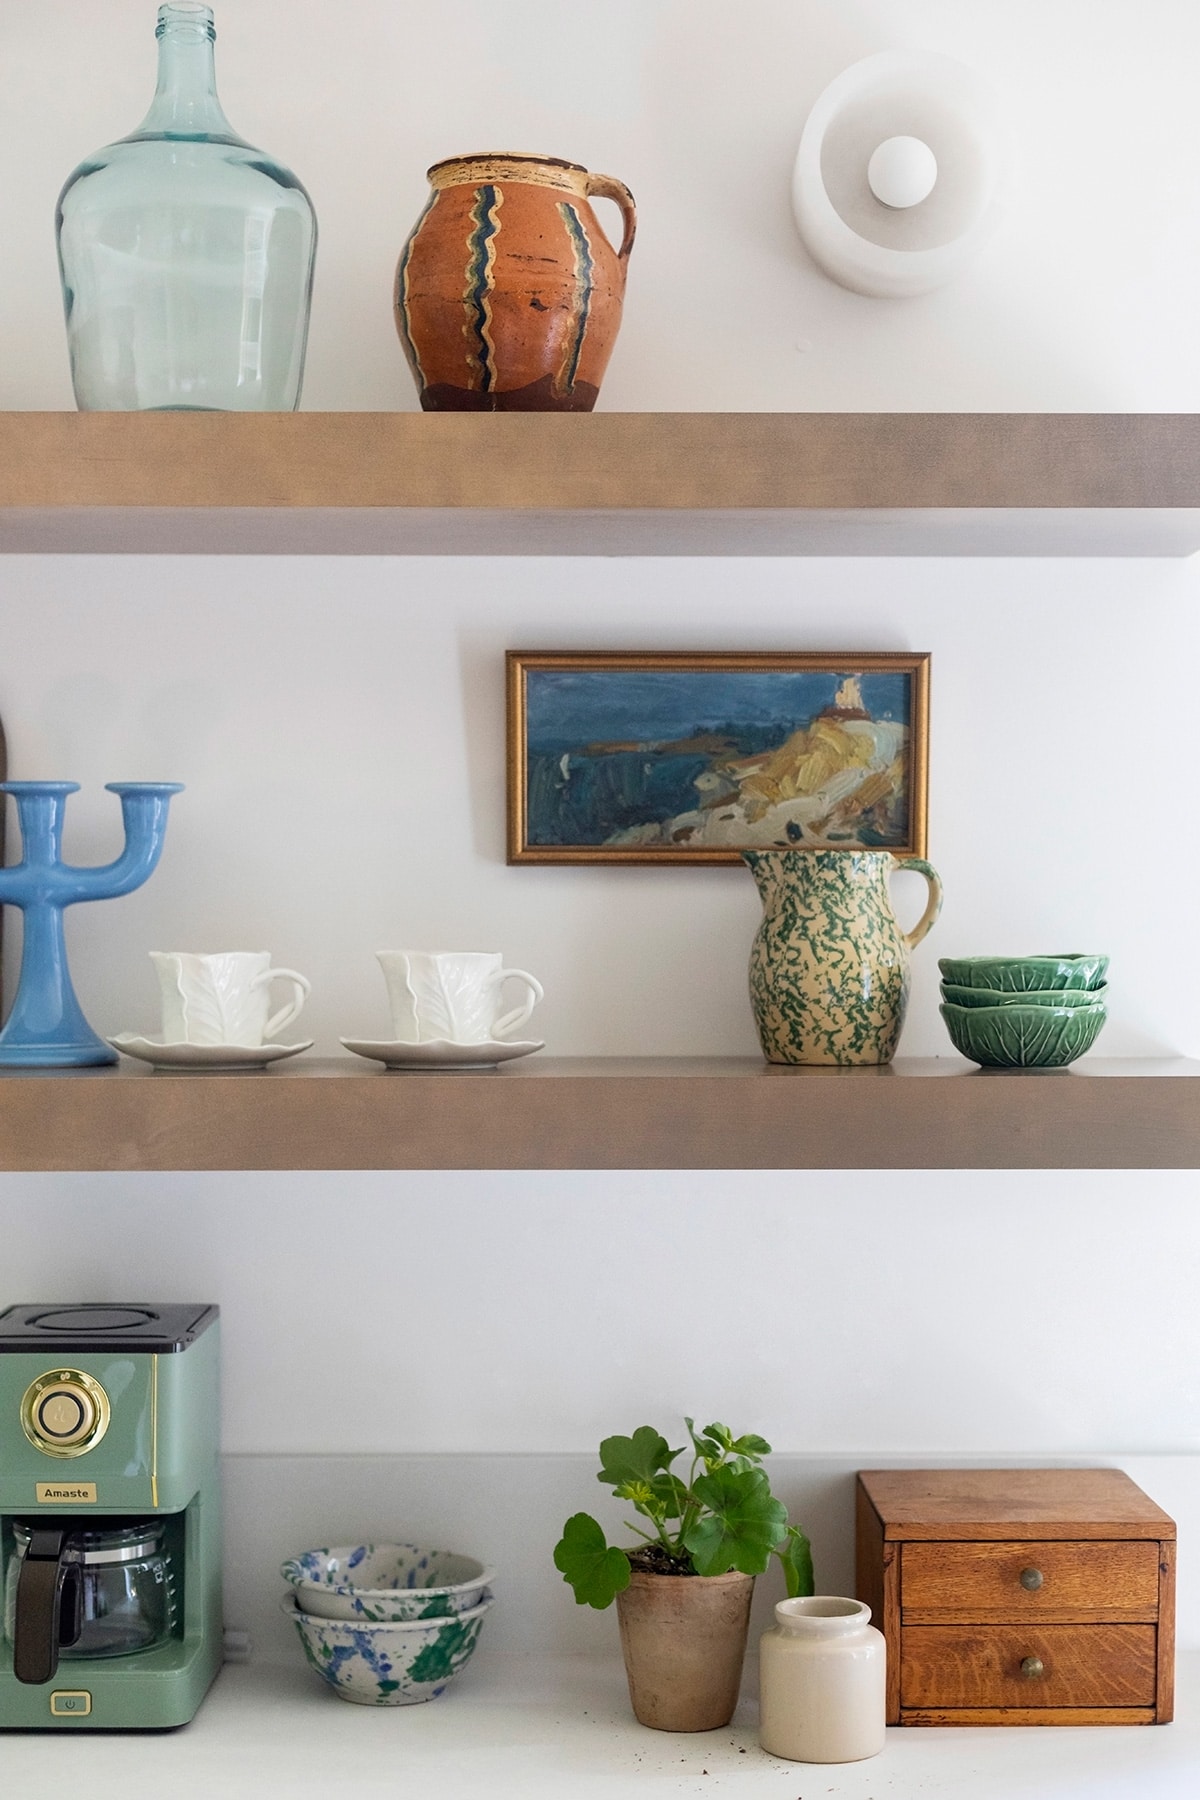
- It’s a trend and it won’t last. Wellll… you may be right. Or you may not. Open shelving has been ‘trending’ for a while now and I don’t think it’s going away anytime soon. It helps break up the heaviness of so much cabinetry, allows more light to travel through the space, and its a beautiful spot to display and store items like cookbooks, pottery, glassware, and more. I do think it’s important to ask whether it makes sense for your kitchen. You don’t want to adopt a ‘trend’ just because you like it if it takes away from the functionality!
The bottom line is, if it works for you, and you love it – just do it! That was kind of my entire philosophy for this space actually. Which is the perfect segue to the topic of style!
COLOR & STYLE
When it came to choosing the style of cabinetry, beadboard was always my first inclination. I was inspired by a furniture cabinet piece that I had originally thought about using for the space (which didn’t work out) and had beadboard detail, so the idea just stuck with me. But before I made that call, I decided to focus on the finish. After pulling a lot of inspiration, I knew I wanted to do either a light wood, a creamy white, or a sage green for the cabinet color. Once we knew we were keeping the terra cotta floors, that quickly ruled out wood for me. And while cream would have been just fine, it would also have been the exact same color as our main kitchen, and that felt a bit boring. A quick look at the options offered by Diamond cabinets showed three shades of green: one that was more of a gray with a green undertone (Limestone), one that was a midtone green with quite a bit of blue in it (Seaside), and one that was a classic dark green (Foxhall).
Sadly, neither of the true greens were the right color – both just felt too dark for the space. While the basement may look nice and bright in these photos, I can assure you that it only gets that kind of light about four hours a day … when it’s actually sunny. Any other time of day or year in there and colors feel dark very quickly, and I wanted to keep things feeling light. So the final call was made, and we went with Limestone.
The color itself changes quite a bit in the space throughout the day but I’d say that this image most accurately captures the putty tones, and how much they change in different light!
Some have argued (not wrongly) that the beadboard just doesn’t make sense’ with the tile. Ya’ll. Not much makes sense with this tile. I feel like I’d have had to do a full on dark walnut or a hand built plaster cabinetry for it to make sense with this tile – and neither of those was happening. So I did what I wanted. I chose beadboard because I loved it. It also does make sense with the 1920’s craftsman farmhouse style of the home. So if someone comes along one day and wants to rip out those tiles (God bless them for it) the rest of the kitchen will still make sense.
Also, this is where I started to imagine bringing in the elements I wasn’t getting fro the cabinet in other ways. The green came in through the backsplash and other styling accents. The natural wood came in through the floating shelves and the cabinet we brought downstairs. Choosing the cabinets we did gave me the opportunity to use those elements elsewhere!
FUNCTIONALITY
I told you in the beginning of the post that we’d get back to the reason we didn’t end up adding another cabinet piece here, and – yes – it’s alllll about the functionality of the room. And yes, we’ll talk about some of the other functionality pieces too, but this is a big one because it teaches an important lesson.
So, originally I had thought it would be nice to have a cabinet moment here that also acted as an entryway moment. Part of the challenge with this kitchen is thinking through all the ways it may be used. Not just now, as a secondary cellar kitchen. But a few years (or more) from now when we want to use it as an apartment. Or the in-between times when it’s serving guests. And what I realized was: If this was my full time kitchen I would want the flexibility to use that wall for multiple options. It could easily house some seating and a small table for a breakfast nook. You could bring in a kitchen island that sits against the wall, and pulls out as needed. Or, you could do what we’ve done here, and simply add shelving for more storage.
Those of you who have followed me for a while may recognize this piece as the one we had in our living room for quite some time! It was literally just a few inches too big for the space we had it in, and once I started reimagining other ways to use this wall, it came to me: This cabinet was perfect. It brought in the wood tone I had wanted a dose of and it offered more storage for big items like all my flower vases, and extra entertaining pieces like large bowls and cake plates that don’t really have a spot upstairs. I added the hat rack for my garden hats, and the bench mostly to visually round things out, but it has become a good spot to plop down items from the garden like gloves and extra pots.
But the biggest lesson here was that thinking through the functionality of this space not only for ourselves, but for future tenants, helped us make a smarter choice.
As for functionality with the cabinets, for me, its something we think about from the very beginning of the process (layout and flow of the space) to the very end of the process (what type of inserts are we putting in the cabinets, and where is each item going to go?). This time around, that process became really different, and it was kind of a relief to not have an exact plan for everything. But the one thing that I’m so glad we did is the open shelving. Not only in the floating shelves but the open shelf in the corner. It’s so helpful when you’re dealing with flowers and veggies to not have to open doors or sift through cabinets to find what you’re looking for. Having the shelves and countertop function as a space to hold vases, flower clippers and shears, pitchers, colanders, you name it… it makes more sense for us. And when the time comes for a tenant to use the cabinets, I’m pretty sure they’ll be just fine with the options we have.
So there you have it friends. A total breakdown (and maybe more than you really wanted to know!) about the cabinetry process. A HUGE huge thank you to our cabinet sponsor, Masterbrand, and their Diamond cabinet line. From start to finish, they were so helpful in creating the space of my dreams!